

https://ithemes.com/ithemes-security-pro-lockouts-guide/
iThemes Security Pro lockouts are a way to harden your website against external attacks, including WordPress brute force attacks. In this guide, we’ll cover iThemes Security Pro lockouts and how to use them.
Keep reading for tips to avoid the dreaded lockout screen (in case you or your client has accidentally locked yourself out of your website) and how to release the lockout if it’s triggered. (Locked out? Get the release lockout solution now!)
What Types of iThemes Security Pro Lockouts Are There?
There are multiple ways a lockout can be triggered using the iThemes Security Pro plugin.
The 4 types of iThemes Security Pro lockouts:
1. Host Lockout
A Host Lockout is when someone using the same IP address makes repeated incorrect login attempts.
Set the number of attempts before an IP address is blocked in Security > Settings > Local Brute Force Protection. In the image below, you can see the Max Login Attempts Per Host are set to 5.

In Security > Settings > Global Settings, you can determine what the locked out host will see as a reason for the lockout. The default is set to display a bolded error message.
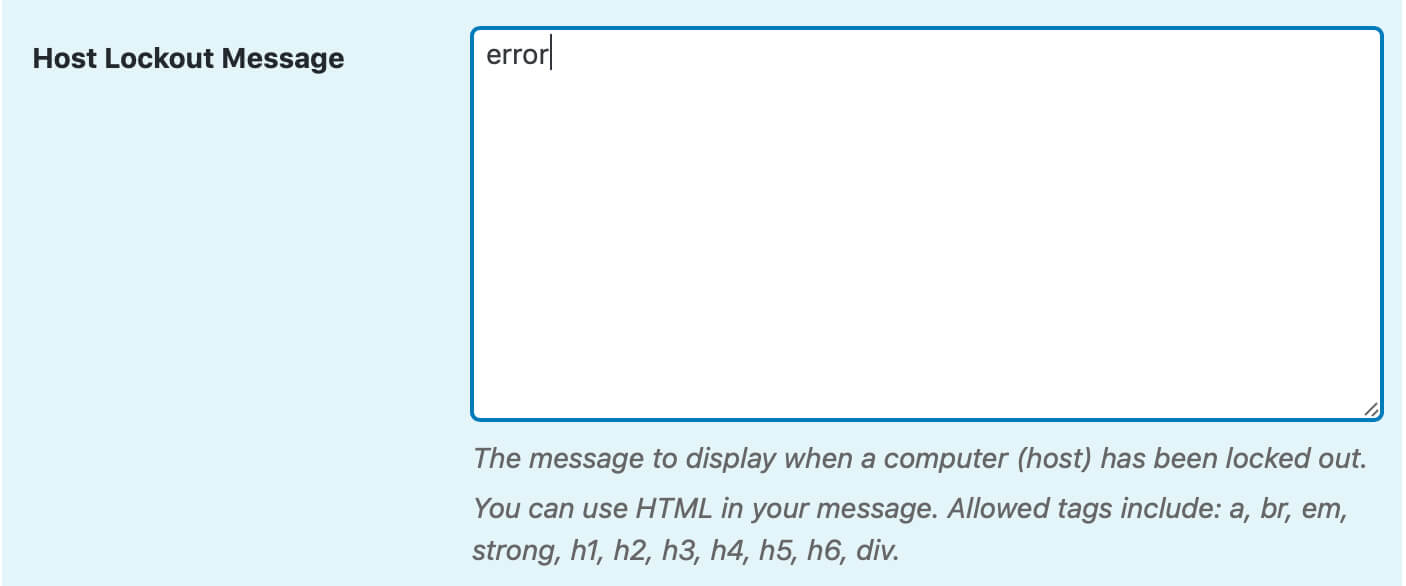 You can use HTML in your message. Allowed tags include: a, br, em, strong, h1, h2, h3, h4, h5, h6, div.
2. User Lockout
A User Lockout is when a username belonging to an existing user is used for multiple incorrect login attempts.
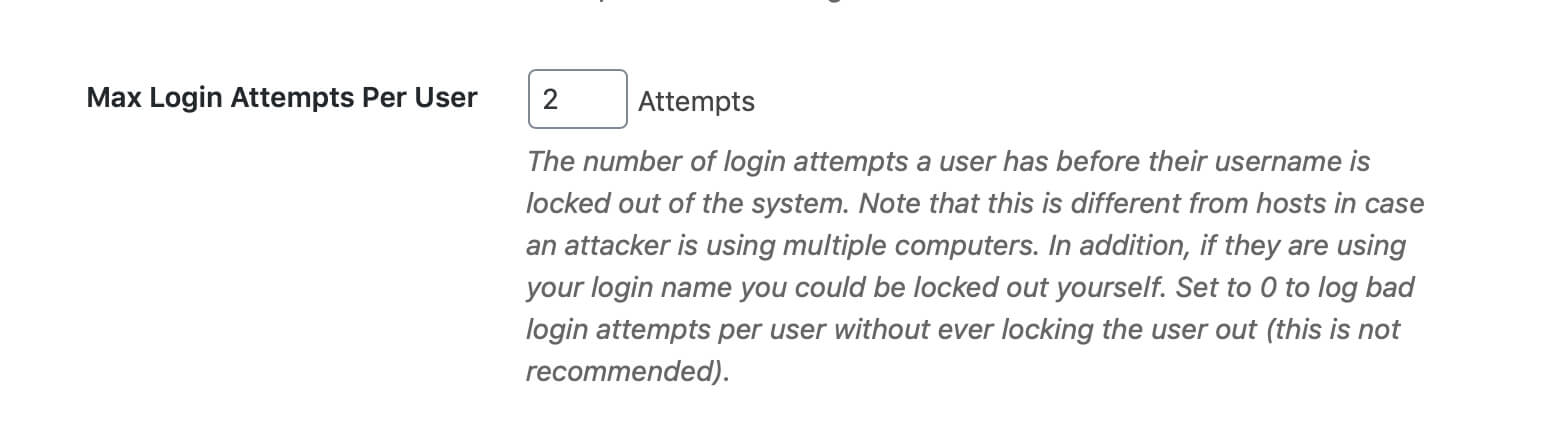
You can set the number of attempts before a user is blocked in Security > Settings > Local Brute Force Protection. In the image below, you’ll see the Max Login Attempts Per User are set to 2.
In Security > Settings > Global Settings, set what the locked out user will see as a reason for the lockout. The default displays “You have been locked out due to too many invalid login attempts”.
You can use HTML in your message. Allowed tags are the same as Max Login Attempts Per User.
3. Username Lockout
A Username Lockout is when a username that does not exist is used for multiple incorrect login attempts.
You won’t need to set up anything special for this, as the settings and message are the same as your User Lockout settings.
4. Community Lockout
A Community Lockout uses the Network Brute Force Protection in Security > Settings > Network Brute Force Protection to ban users who have tried to break into other sites and prevent them from breaking into yours.
The network protection will automatically report the IP addresses of failed login attempts to iThemes and will block them for a length of time necessary to protect your site based on the number of other sites that have seen a similar attack.
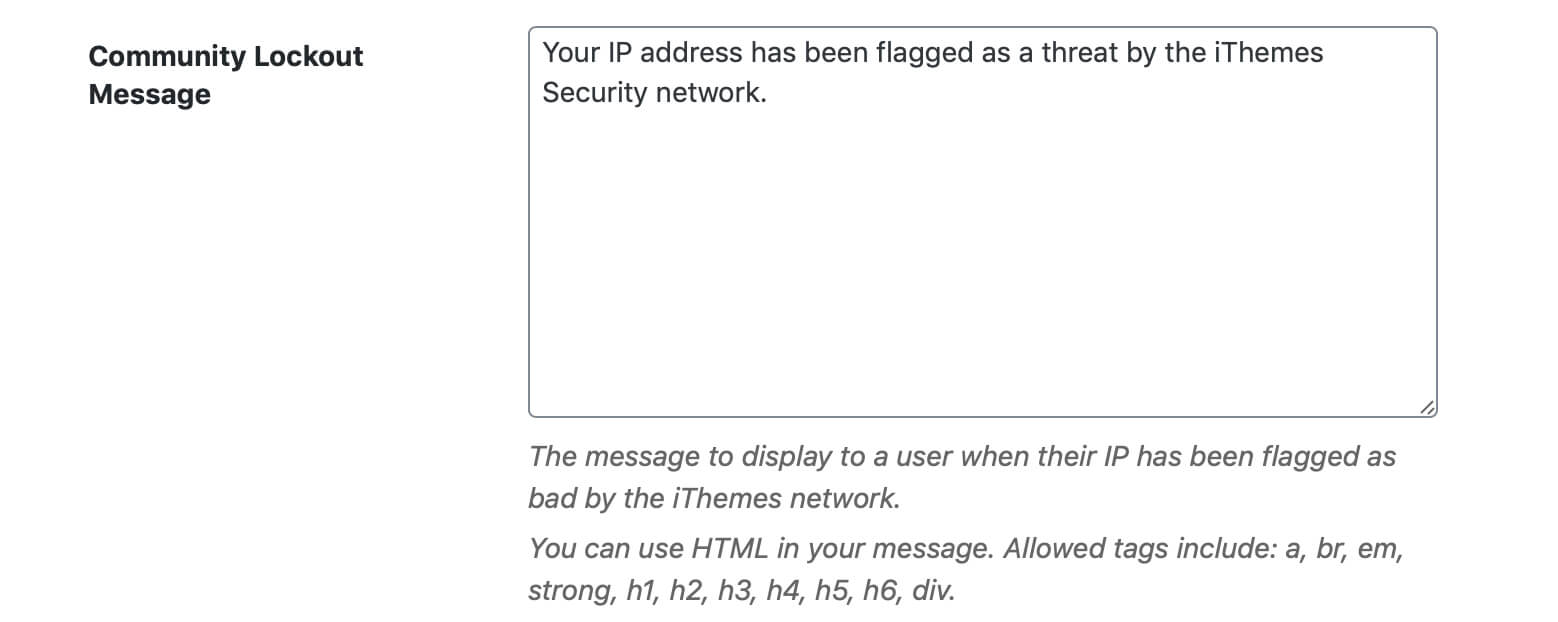
When you’ve enabled this option, you can set the details for the Community Lockout Message in Security > Settings > Global Settings. Unless you change it, the message will read, “Your IP address has been flagged as a threat by the iThemes Security network.”

What Happens When a Lockout is Triggered?
When someone (or some bot) triggers a lockout, they run into your lockout settings.
The first place to configure those is in Security > Settings > Global Settings.
You’ll want to make selections for the following:
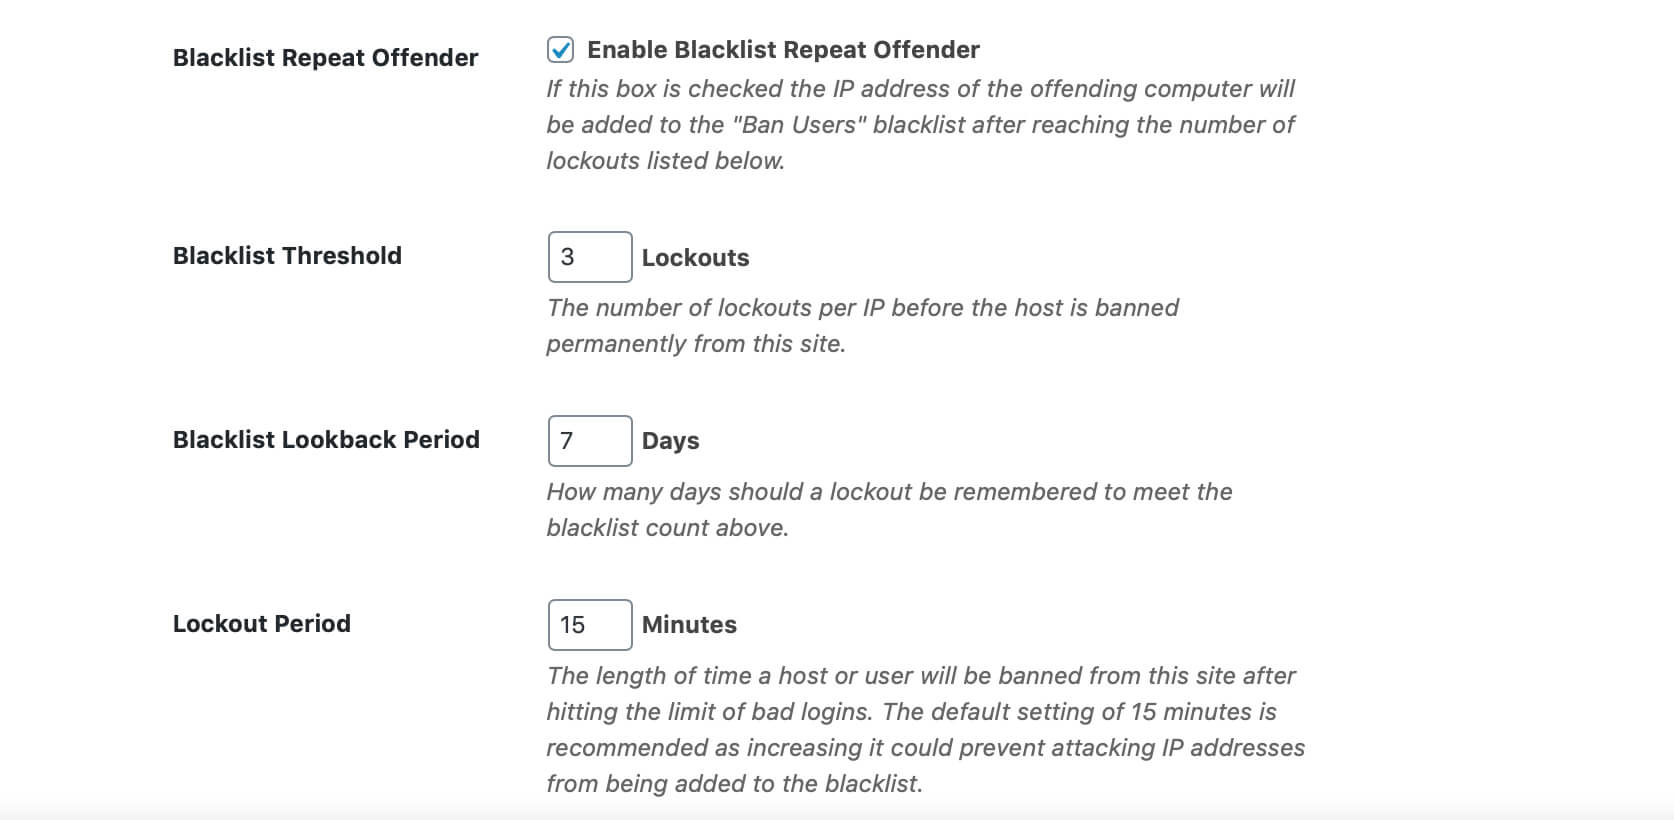
- Blacklist Repeat Offender – Do you want to permanently ban them from the site if they keep trying to get in?
- Blacklist Threshold – How many times do you want to lock them out before they are banned?
- Blacklist Lookback Period – How many days do you want to remember a lockout, to count it toward the ban rule?
- Lockout Period – How long should the lockout last? We recommend leaving it at the default 15 minutes.
Next, you’ll want to go back over to Security > Settings > Brute Force Lockouts.
Make sure Minutes to Remember Bad Login (check period) is set for at least 5 minutes.
How to Release iThemes Security Pro Lockouts
You’ve been locked out – now what? If you’re seeing this screen, you’ve been locked out by the iThemes Security plugin.
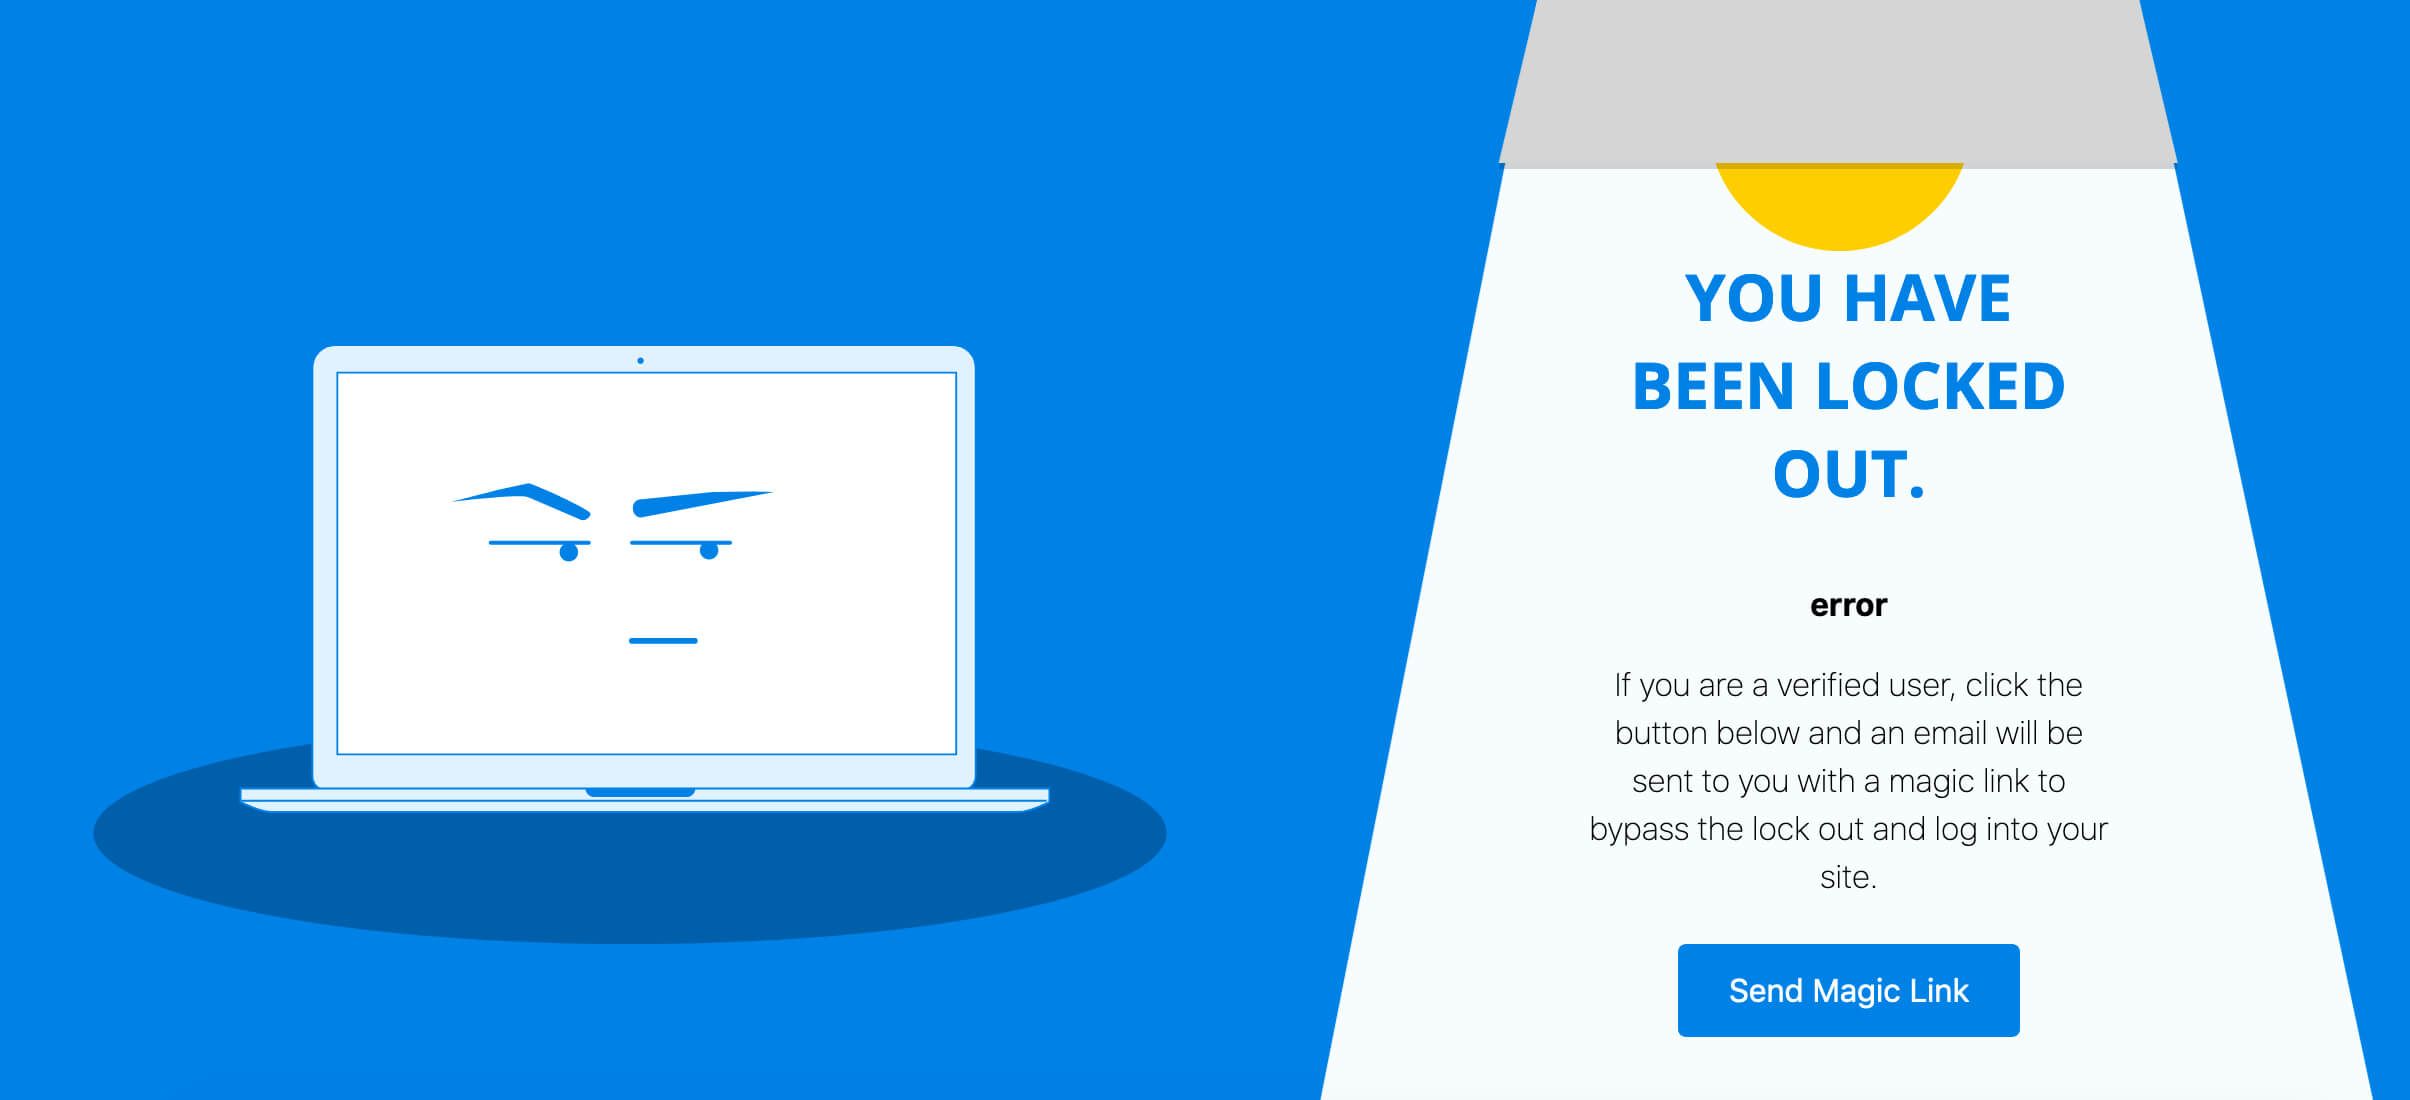
Obviously, you want people to see the screen above if they are trying to break in. But what happens if you – or your client – gets locked out?
Enable Magic Links
The easiest way around that is to go to Security > Settings > Magic Links and enable those. If you’re locked out, all you have to do is enter your email address, and you’ll receive an email with a login link that automatically releases/bypasses the lockout.
Release Lockouts from the Site Admin
Sometimes, though, a site user will be locked out, and they have not updated an email address or have otherwise lost access to the email address associated with their account.
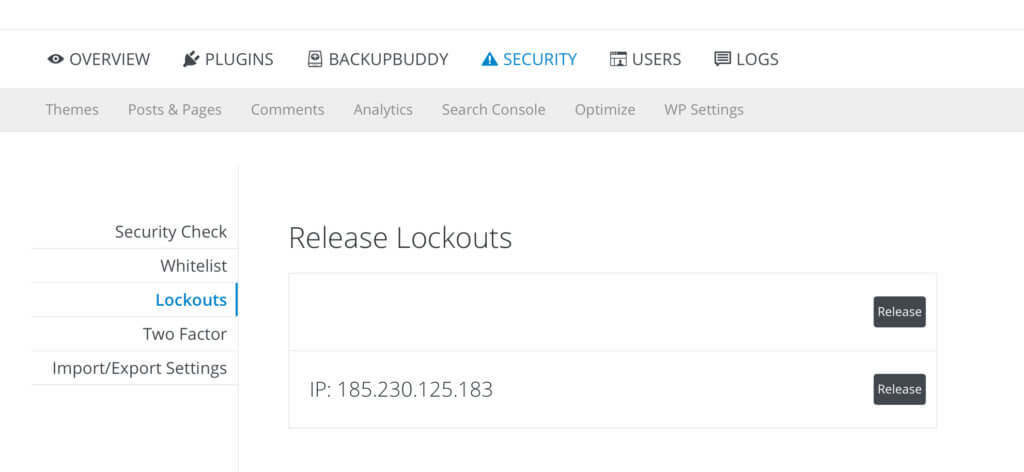
In that case, you can log in to your site, go to Security > Settings, and release their lockout from the Active Lockouts box on the far right
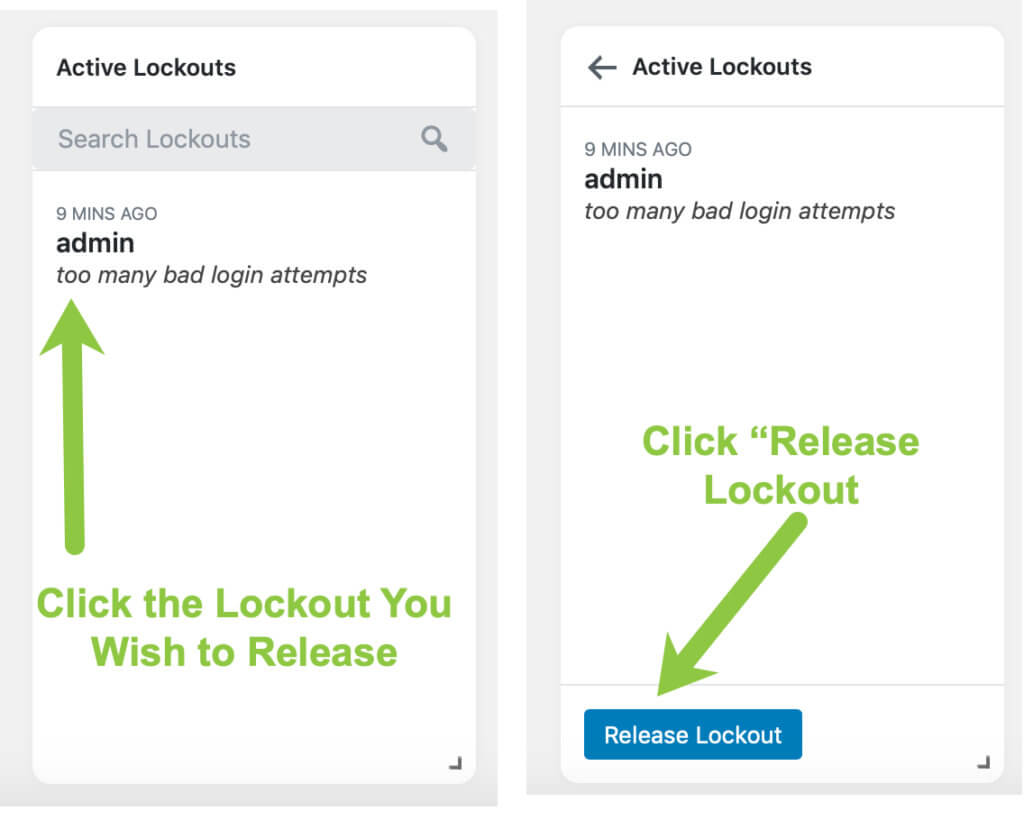
Release Lockouts from the Security Dashboard
If your Dashboard is enabled, you can release Active Lockouts from Security > Dashboard > Active Lockouts. Click on the lockout you wish to release, then click the blue “Release Lockout” button.
Release Lockouts from iThemes Sync
If you use iThemes Sync, you can also release lockouts by logging into sync.ithemes.com and clicking on Domain Name > Security > Lockouts.
iThemes Security Lockouts: That’s a Wrap!
As always, if you need assistance with iThemes Security lockouts, or anything related to iThemes Security Pro, please drop us a line in the Helpdesk! Our support staff is with you Monday-Friday, 8-5 Central Time, excluding Major U.S. Holidays.
Get the iThemes Security Pro Plugin Today
iThemes Security Pro, our WordPress security plugin, offers 30+ ways to secure and protect your website from common WordPress security vulnerabilities. With WordPress, two-factor authentication, brute force protection, strong password enforcement, and more, you can add an extra layer of security to your website.
Get iThemes Security Pro
The post A Guide to iThemes Security Pro Lockouts appeared first on iThemes.
Source: Security Feed