When it comes to Windows PC, you can experience every error in any sectors including “explorer.exe class not registered”. Just like many other Windows errors, explorer.exe can sometimes experience a malfunction. This then triggers the unregistered class problem in the process. Usually, you will see a notification containing the error message about the explorer.exe itself.
Many things can cause the “class not registered” error in a Windows PC. In the case of explorer.exe, it usually takes conflicting processing in the system. You cannot open the Explorer program on your Windows PC before you see the “class not registered” message appearing on your Windows screen.
Other than explorer.exe, other Windows programs can also experience this issue. From Windows Video Player to Microsoft Edge, the “class not registered” error can happen if there is a clash in the system. It usually takes quite a conflict of updates to cause the “class not registered” error on your Windows PC.
Aside from the conflicting matters in the system, the “class not registered” error can also be caused by several other things. Since the problem of “class not registered” can vary in causes, the methods to fix it can also vary as well. In order to fix the problem, we shall know what we are getting into first.
Without further ado, let’s check out a brief overview of the problem of “class not registered” and how it can affect explorer.exe in your Windows PC.
“Class Not Registered” Error and explorer.exe on Windows PC
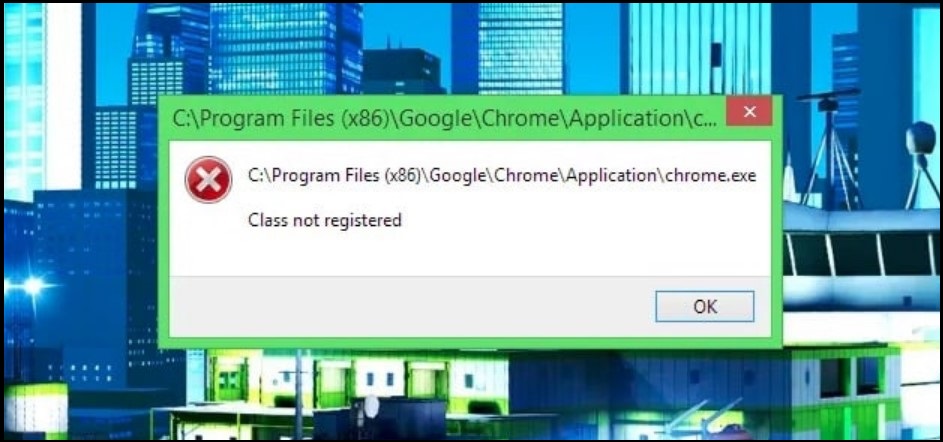
As you may know, the “ class not registered” error can happen to any of Windows programs. Due to the clashes or conflicts which may happen after the updates or installation of certain programs, every Windows program can also experience this type of error.
If you find an error message containing the “class not registered” message whenever you try to open a certain program, mostly explorer.exe, then you need to perform the right method to fix it.
Since the problem of “class not registered” can come any times, there are quick fixes you can do to fix the error. Just like any programs experiencing an error, you can try to restart it and see if it can work normally again.
Other than that, you can try to disable the programs momentarily and enable it back. Afterward, you can try to operate the program again. See if the “class not registered” error has been fixed or not.
Other than performing a quick fix, you can also try to change the setting of a program currently affected by the “class not registered” error. Keep in mind that you will need guidance in order to change the setting of a certain program. If you have advanced knowledge of Windows programs, then you can try to perform the method on your own.
You should make sure that no drastic changes will be made to the program affected by the “class not registered” error. Make sure to avoid more errors along the way with the right method to fix the “class not registered” error.
Many Types of “Class Not Registered” Errors
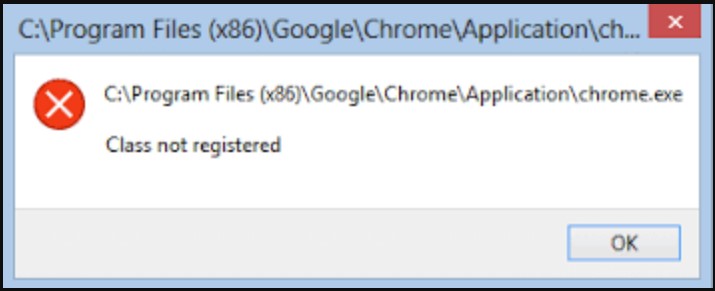
Aside from “explore.exe class not registered” error, the “class not registered” issue can happen to any other Windows programs. Most of the time, it happens to programs operating similarly to Windows Explorer. If you wish to open pictures or videos on your Windows PC and see the error message containing the “class not registered” statement, then you must try to fix it. Otherwise, you will not be able to use the program to open picture files.
Other than explorer.exe, the “class not registered” error can also happen to programs like Excel, Taskbar, Internet Explorer, Microsoft Outlook, and Microsoft Edge. Since the problem can come from the conflicts in updates or installations in the system, many programs can be affected by the “class not registered” error without any exceptions.
Whether it be the program to open a Word or PDF file or programs associated with msstdfmt.dll, the “class not registered” error will affect them if they find a way to do it. The quick fix is to try to open another file and see if the error still exists or not.
Aside from that, you will need to perform the right method to fix the “class not registered” error on your Windows PC.
Methods to Fix “Class Not Registered” Error on explorer.exe
It must be quite annoying to open a Windows Explorer and see a message “explorer.exe class not registered” on your Windows 10 screen. For such an important program to experience an error, it makes it difficult to open the files you wish to work on.
Since there is no other way to open the files in your Windows local drives, then the “class not registered” error on your Windows 10 explorer.exe needs to be fixed immediately.
Due to the nature of the storing program, the methods to fix it mostly revolve around the settings or the resetting of another storing program within your Windows 10 PC as well. By tweaking certain settings within the system, the “class not registered” error will hopefully cease to exist at once.
Other than that, you can also try to make another Microsoft account if the issue cannot be solved with soft tweaks. Since the explorer.exe needs to operate again, you will have to make sure of trying every possibility.
Additionally, you can also check on your Windows 10 PC’s hard drive if the problem cannot be solved. All of these methods may work well to fix the “class not registered” error on the explorer.exe on your Windows 10 PC.
In order to perform the possible methods to fix the “class not registered” on explorer.exe above, you can try to take a look at the detailed steps we have curated below. See if one of the methods below can fix the problem for you.
Disabling Windows 10’s iCloud

If you have more than one storing program on your Windows 10 PC, then you must try to disable one of them. In this case of “class not registered” error on explorer.exe, you will need to make a quick fix by disabling the iCloud.
To perform a quick fix to this issue, you will need to close the iCloud program. You can do it from the Task Manager window. In order to perform this method, you can follow the steps below.
Step 1: Proceed to press Ctrl, Shift, and Esc buttons at the same time to open Task Manager.
Step 2: Once you get to the Task Manager window, you can locate iCloud.
Step 3: Then, you can right-click on it and select the option “End Task”.
Other than finding the iCloud on the Apps tab, you can try to disable the program on the Startup tab. To do so, you can follow the steps below.
Step 1: Proceed to head to the Task Manager by pressing Ctrl, Shift, and Esc buttons at the same time.
Step 2: Head to the Startup Tab and locate the program “iCould”.
Step 3: Afterward, you can right-click on it and select the option “Disable”.
Step 4: At last, you can restart your Windows 10 PC to save and apply the changes and see if the “class not registered” error on explorer.exe disappears or not.
Registering ExplorerFrame.dll Again
Sometimes a certain file in your Windows program can malfunction that it causes a “class not registered” error. In this case, you can try to fix it by registering a certain file named explorerframe.dll once again.
This way, you can fix the “class not registered” error on your Windows 10’s explorer.exe by not changing anything.
In order to perform this method, you can follow the steps below.
Step 1: Proceed to open the Windows’ Command Prompt with the Admin rights. You can press Windows and X buttons at the same time, then select the option “Command Prompt (Admin)” from the menu.
Step 2: Once the Command Prompt window appears, you can type the command “regsvr32 ExplorerFrame.dll” and press Enter afterward.
Step 3: Wait until the command finishes the processing.
Step 4: At last, you can restart your Windows 10 PC to save the changes.
Using Component Services to Fix “Class Not Registered” on explorer.exe
In order to fix the “class not registered” error on explorer.exe, you will need to get to every program associated with it and change some settings.
In this case, you can use the Component Services to fix the issue. What you can do with this method is to make necessary changes to get your Windows Explorer program running normally again.
To perform this method, you can follow the steps below.
Step 1: Proceed to open the Run box by pressing Windows and R buttons at the same time.
Step 2: Afterward, you can type dcomcnfg and press Enter or click OK to open the Component Services.
Step 3: Once you see the Component Services window on the display, you can head to the Computers section.
Step 4: Afterward, you can go to the section “My Computer”.
Step 5: Proceed to find the option “DCOM Config” and double click on it.
Step 6: If you see a couple of warning messages, you can proceed to click “Yes”.
Step 7: Once the processing finishes, you can restart your Windows 10 PC and see if the “explorer.exe class not registered” is fixed or not.
Creating A New Microsoft Account
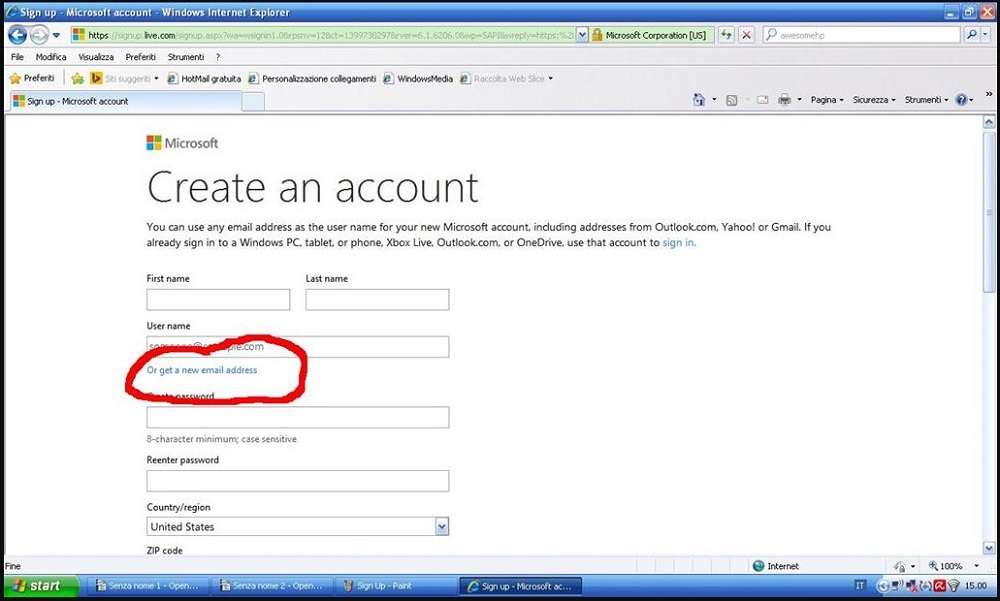
When all else fails, you can always try to make a new Microsoft account to fix the “explorer.exe class not registered” error on your Windows 10 PC. Keep in mind to consider all of the methods we have previously curated above before trying on this.
If you have tried all of the methods to no avail, then you can follow the steps below to create a new Microsoft account. See if it can fix the “explorer.exe class not registered” error on your Windows 10 PC.
Step 1: Proceed to go to the Windows 10’s Settings. Try to press Windows and I buttons at the same time to get there fast.
Step 2: Once you see the Settings window on the display, head to the “Accounts” section.
Step 3: Look at the right pane and click on the option “Family”.
Step 4: Then look at the option “other people” from the menu on the left.
Step 5: Afterward, you can proceed to choose the option “Add someone else on this PC” on the right pane.
Step 6: Proceed to type in your Microsoft account email and click Next to continue.
Step 7: Then, you can log out of your current Microsoft account and use the new one.
Additionally, you have to make sure to log in from your local account to make this work. In order to do so, you can follow the steps below.
Step 1: Head to the Windows 10’s Settings.
Step 2: Afterward, you can click on the section “Accounts”.
Step 3: Choose the option “Sign in with a local account instead”.
Step 4: At once, you will have to enter the password to your current account.
Step 5: Once you finish, you need to enter the username and password of your local account.
Step 6: Proceed to choose the option “Sign out” and click on the “Finish” button to complete the process.
Step 7: Once you have done that you can now log in to your Windows 10 PC with your local account.
Step 8: With the local account, you can perform the method above to fix the “explorer.exe class not registered” on your Windows 10 PC.
Checking Windows 10 Hard Drive
If none of the methods above work, then the “explorer.exe class not registered” error may come from your hard drive. Usually, the “class not registered” issue can be solved with a few tweaks in the settings as presented by the above methods. In case you cannot fix the problem still, then you must check your Windows 10 PC hard drive.
To do so, you will need an expert’s help. You can bring your Windows 10 PC to the nearest service center and let the expert technician fix the problem for you. Alternatively, you can try to buy a new hard drive if the problem still persists.
Methods to Fix the “Class not registered” Error on Microsoft Edge
Other than “class not registered” error on exporer.exe, you will need to fix the same error if it happens to another program. One of the programs which may be affected by this error is Microsoft Edge.
In order to fix the “class not registered” error on Microsoft Edge, you can perform the quick fix below.
Changing the Setting of Microsoft Edge or Internet Explorer to Default
Aside from the “class not registered” error on explorer.exe, this type of error can also happen to your Windows built-in browser. In order to fix this, you can set Microsoft Edge or Internet Explorer on your Windows 10 as a default browser. To do so, you can follow the steps below.
Step 1: Proceed to press Windows and S buttons at the same time.
Step 2: Then, you can type “control panel” on the Windows search box.
Step 3: Afterward, you can click on the section “Control Panel” from the search result.
Step 4: On the Control Panel, you can click on the option “Default Programs”.
Step 5: Once the “Default Programs” window appears, you can choose the option “Set your default programs”.
Step 6: Afterward, you can head to the “Web browser” section and click on the browser option.
Step 7: Then, you can choose the option “Microsoft Edge” from the list.
In case you cannot do the procedure above, you can try to perform the alternative method to set Internet Explorer as the default browser. To do so, you can follow the steps below.
Step 1: Head to the “Settings” window and go to the “Apps” section.
Step 2: On the left pane, you can select the section “Default apps”.
Step 3: Proceed to go to the “Web browser” section and set the Internet Explorer as the default browser on your Windows 10.
Making Sure the Internet Explorer ETW Collector Service is Running
In case you see the “class not registered” error, you can try to make sure the ETW Collector service is running. Since the “class not registered” error can affect your Internet Explorer and Microsoft Edge, you can try to perform this method to make sure there is nothing wrong with your browser’s settings. To do so, you can follow the steps below.
Step 1: Proceed to open the Run box by pressing Windows and R buttons at the same time.
Step 2: Once the Run box appears, you can type services.msc on the search box and press Enter or click OK.
Step 3: Afterward, you can find the option “Internet Explorer ETW Collector Service” in the list of services.
Step 4: Proceed to right-click on it and select the option “Start”.
Step 5: Wait until the processing finishes.
Step 6: At last, you can restart your Windows 10 PC and see if the “explorer.exe class not registered” error is fixed or not.
Restarting explorer.exe to Fix “Class Not Registered” Error
In case you have a problem with “explorer.exe class not registered” error, you can always make sure to restart the program. In the most desperate time, restarting a program usually can fix the error. To do so, you can follow the method below.
Step 1: Proceed to go to the “Task Manager” window.
Step 2: Then, you can head to the “Details” tab.
Step 3: Afterward, you can find the “explorer.exe” and right-click on it.
Step 4: Proceed to select the option “End Task” from the menu.
Step 5: On the Task Manager window, you can head to the “File” tab.
Step 6: Then, you can select the option “Run new task”.
Step 7: At once, the “create a new task window” will appear.
Step 8: Afterward, you can type explorer in the search box and press Enter or click OK.
Step 9: You can see the Explorer operating again without any problems.
Methods to Fix the “Class Not Registered” Error on Picture File on Windows 10
Since you have the “class not registered” issue on explorer.exe, you should expect the same error when you open any picture files too.
In order to fix this issue, we have curated a couple of methods for you. Take a look at the methods below and see which one can fix the “class not registered” error on your Windows 10.
Modifying the Settings from Image Viewer to Windows Photo Viewer
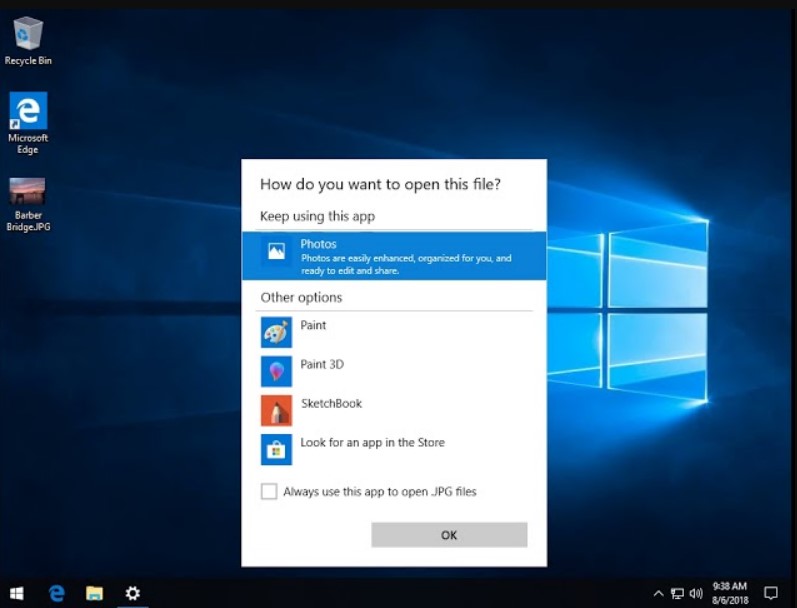
If you see the “class not registered” error every time you open a picture file, then you can change the default program settings to open the picture files on your Windows 10 PC.
In case you still use Image Viewer, you can change the image opener program to Windows Photo Viewer. To do so, you can follow the steps below.
Step 1: If you do not have Windows Photo Viewer, you can download it first and run it afterward.
Step 2: Proceed to choose any pictures on your Windows 10’s local drive and right-click on it.
Step 3: Select the option “Open with”, then you can choose the option “Choose another app”.
Step 4: Afterward, you can select the option “Windows Photo Viewer” from the list of apps available.
Step 5: Make sure to choose the option “Always use this app to open .jpg files”.
Step 6: Proceed to click on the “OK” button to save and apply the changes.
Step 7: Try to see if you can open a picture file with Windows Photo Viewer.
Resetting Default Programs
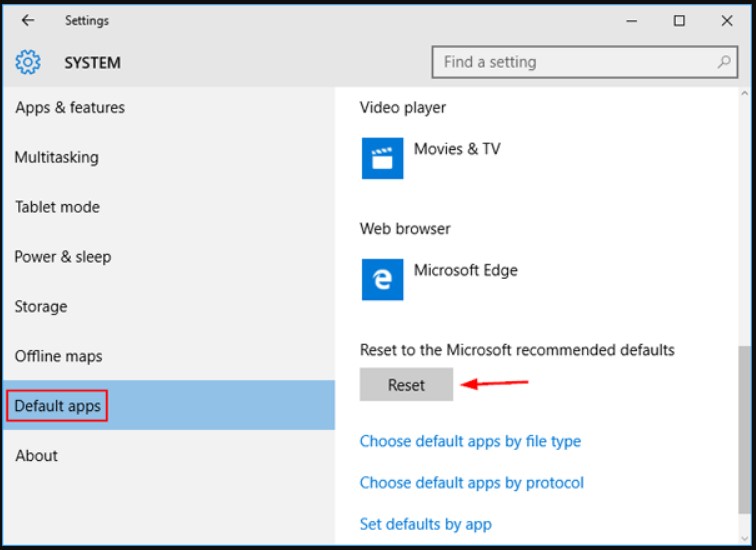
If you keep seeing “class not registered” error every time you open an image file, you can try to reset the default programs on your Windows 10 PC. To do so, you can follow the steps below.
Step 1: Proceed to head to the Windows 10’s Settings.
Step 2: Afterward, you can navigate your way to the “Apps” section.
Step 3: Then, you can make your way to the section “Default apps”.
Step 4: Find the option “Reset to the Microsoft recommended defaults” and click on it.
Step 5: Wait until the processing finishes.
Step 6: At last, you can restart your Windows 10 PC and see if the “class not registered” error is fixed or not.
Conclusion
Many things can cause the “class not registered” error in a Windows PC. In the case of explorer.exe, it usually takes conflicting processing in the system.
You cannot open the Explorer program on your Windows PC before you see the “class not registered” message appearing on your Windows screen.
Since the problem of “class not registered” can vary in causes, the methods to fix it can also vary as well. In order to fix the problem, we shall know what we are getting into first.
Without further ado, let’s check out a brief overview of the problem of “class not registered” and how it can affect explorer.exe in your Windows PC.
Source: Security Feed

